
Ordering and Gang Sheets
DTF Gang Sheets Australia: How to Build, Order and Press Your Sheet
Jun
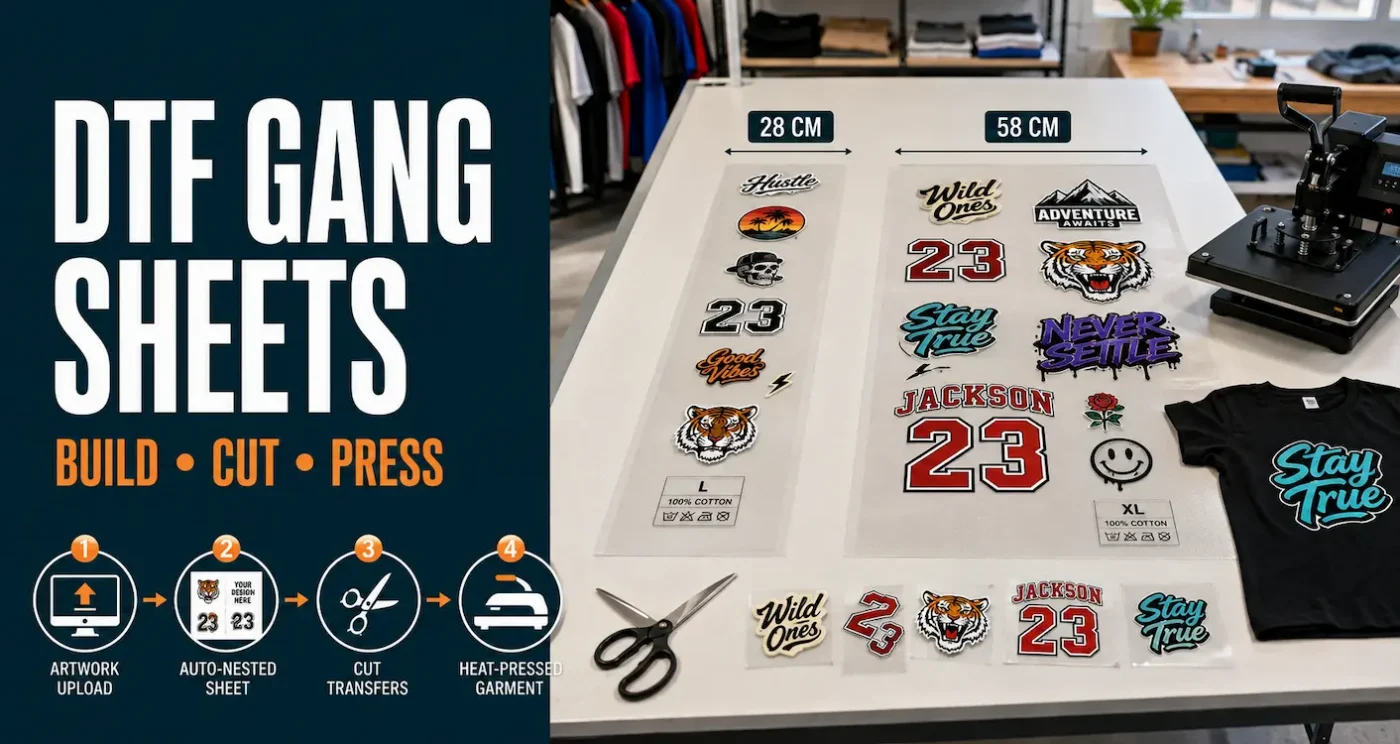
A chest logo, a back print, a few names and a smaller version for the kids’ shirts: these can all share one DTF gang sheet. The trick is to plan what you actually need before filling the available space.
A DTF gang sheet is a sheet of transfer film containing several designs, sizes or copies, printed together and supplied ready to cut and heat press onto suitable garments. You prepare the artwork and choose its size. We print the transfers at our Coorparoo workshop; you apply them to your own garments.
This guide takes you from the job list to the finished print, including how to choose a width, use our online builder and compare the cost of usable transfers. The goal is a sheet that is economical and straightforward to work with.
At a glance
- Our standard gang sheets are 28 × 100 cm or 58 × 100 cm.
- You can combine different designs and different sizes on the same sheet.
- A tightly cropped, transparent PNG at 300 DPI at its final print size is the recommended starting file.
- Set each image’s dimensions and quantity, then check the complete layout before approving it.
- Leave enough carrier film for cutting, handling and peeling.
- Standard gang sheets require a heat press. Household iron-on and specialty finishes are separate products.
- Cotton uses the current immediate-peel process; polyester requires its own lower-temperature, cold-peel process.
In this guide
- When is a gang sheet the right choice?
- Choosing 28 cm or 58 cm width
- Plan your sizes and quantities
- Prepare artwork that is ready to print
- How to use the online gang-sheet builder
- Make the layout easy to cut and use
- A worked layout and cost comparison
- Your final approval checklist
- Pressing cotton and polyester correctly
- Cutting, storing and repeat orders
- Frequently asked questions
When is a gang sheet the right choice?
Gang sheets work particularly well when you need repeated logos, mixed artwork or several print placements. A uniform order might include a chest logo and a back print; a clothing label might combine adult and youth artwork with a few smaller brand marks.
Different colours and artwork can share a standard sheet. However, sharing the film does not turn separate product types into one option. Our standard gang sheets use Insta-Peel film with White Standard adhesive. Black adhesive is available on standard cut sheets, while specialty finishes have their own sheet products.
If you only need one small transfer, compare a cut sheet with the minimum gang-sheet order. If you need a household iron rather than a heat press, choose the dedicated iron-on range.
Choosing 28 cm or 58 cm width
Start with the largest design, then look at the rest of the order. The lower sheet price and the lower cost per usable transfer are not always the same thing.
| Format | Film area | Useful starting point |
|---|---|---|
| 28 × 100 cm | 0.28 m² | Smaller quantities, chest logos and narrow artwork. |
| 58 × 100 cm | 0.58 m² | Wider designs, more repeated logos or a mixture of front and back prints. |
A design must fit the sheet’s usable print area in its chosen orientation. Check the width and height, including the room needed to separate it from nearby artwork. If you rotate a design to make it fit, check the resulting layout before approval.
Compare both options on the gang-sheet product page. Use the builder’s printable boundary as your limit rather than assuming the film edge is a safe place for artwork.
Plan your sizes and quantities before uploading
A few minutes with a job list can save a considerable amount of sorting later. Write down the garment group, print placement, finished dimensions and quantity for every version.
For example, a demonstration order of 20 shirts with chest and back prints might be planned like this:
| Artwork | Finished size | Production quantity | Planned test/spare allowance | Total |
|---|---|---|---|---|
| Chest logo | 10 × 10 cm | 20 | 2 | 22 |
| Back design | 25 × 30 cm | 20 | 2 | 22 |
This is a planning example, not a completed customer job or a promise that the whole order fits on one sheet. The builder will show how much film the layout needs. Choose your allowance according to the job: new artwork on an unfamiliar polyester garment deserves more preparation than a proven repeat order.
Measure the actual garments, especially the smallest in each size group. Our transfer sizing guide can help you choose a starting size. A paper mock-up placed on the shirt is also a useful check before committing to the order.
Prepare artwork that is ready to print
Good layout software can arrange a file; it cannot decide whether the phone number is correct or repair a blurred logo. Before uploading, check these essentials:
- Transparency: use a genuinely transparent background. A white box, black box or checkerboard saved into the picture is still artwork.
- Crop: remove unnecessary transparent canvas so the dimensions relate to the visible design.
- Resolution: aim for 300 DPI at the physical size you intend to print.
- Detail: inspect fine lines and small text after resizing. Four pixels at 300 DPI is about 0.34 mm, not 1 mm; those measurements should not be treated as equivalent.
- Orientation: supply artwork in normal reading orientation, without mirroring it yourself.
- Approval: check names, spelling, dates, colours and your permission to reproduce the design.
As a size check, a 10 cm-wide image needs approximately 1,181 pixels across at 300 DPI. A 25 cm-wide image needs approximately 2,953 pixels. Editing the DPI number alone does not add missing pixels or make a small image sharper.
For delicate, isolated details, a more substantial physical line or dot is generally easier to reproduce than a hairline. Check the current artwork requirements for the full detail guidance, upload limit and advice on transparency, colour and fades. If you need to clean up a file, our Photopea preparation guide walks through a browser-based option.
How to use the online gang-sheet builder
Our builder gives you an automatic arrangement option and a manual option. For most first-time orders, start with the Auto Builder and concentrate on getting the sizes and counts right.
- Open the gang-sheet product. Choose the advertised 28 cm or 58 cm width, then select Build a Sheet.
- Choose your approach. Auto Builder arranges the uploaded designs for you. Manual Builder lets you place them yourself.
- Upload the artwork. In the Auto Builder, use Choose Files. The Light and Dark preview backgrounds help you inspect different artwork colours; changing this preview background does not print a background onto your garment.
- Check the crop. Automatic transparent-edge cropping is useful for removing empty canvas. Confirm that the visible design and any deliberate alignment space remain as intended.
- Enter the finished size and amount for each image. Use your job list. Keep the aspect ratio intact and apply your changes before building the sheet.
- Build and inspect the arrangement. Check the printable boundary, separation between designs and the quantities of every version. A tidy preview is not enough if the artwork is the wrong size.
- Review warnings. Investigate low resolution or layout warnings. Acknowledging a warning does not improve the file.
- Check sheet copies separately. Ordering extra copies of a sheet repeats all the artwork on it. Three copies of a sheet containing four chest logos produces twelve chest logos.
- Review the approval screen. Recheck the complete sheet and the artwork/copyright declarations. Keep a job record of the approved sizes and counts.
- Add to cart and check the order. Confirm the product, width, sheet quantity, total and delivery or pickup selection before completing checkout.
We print the artwork and layout you approve. The transfer price does not include routine redesign, spelling correction, background removal or a separate manual proof. Contact us before ordering if you are uncertain about the product or preparation.
Make the layout easy to cut and use
A tightly packed sheet is useful only if you can separate the transfers cleanly. Leave room for your scissors or trimmer, and enough clear film around each piece to handle and peel it.
Rotating artwork and mixing large and small designs can improve the arrangement. Small logos can fill otherwise unusable gaps, but they should be transfers you genuinely need. Ten unwanted labels do not make an order better value.
Keep similar sizes easy to distinguish. Use filenames such as logo-chest-10cm.png and logo-youth-22cm.png, then label the cut pieces. Do not put size notes or order instructions inside the printable artwork unless you want those notes printed.
For mixed customer jobs, consider the trade-off between maximum nesting and easy sorting. A layout that takes slightly more film but avoids mixing two customers’ logos may be the more sensible production choice.
A worked layout and cost comparison
Here is a simple mathematical example: repeated 10 × 10 cm square logos, arranged in a regular grid with 5 mm between logos and 5 mm around the outer edge. These are example spacing assumptions, not a universal instruction or a measured Auto Builder result.
| Calculation | 28 × 100 cm sheet | 58 × 100 cm sheet |
|---|---|---|
| Columns × rows | 2 × 9 | 5 × 9 |
| Logos in this grid | 18 | 45 |
| Example standard sheet price | $21.95 | $30.95 |
| Film cost per logo at full use | About $1.22 | About $0.69 |
The example uses standard AUD prices including GST displayed on 3 October 2026, before delivery or any applicable discount. Check the current product price when ordering. Actual nesting depends on artwork dimensions, shapes, spacing and printable bounds.
At full use, the wider sheet has the lower film cost per logo in this example. But if you only need twelve logos and have no use for the extras, the smaller sheet has the lower initial bill. Count the transfers you will use, not just the number you can fit.
Film cost per usable transfer = allocated sheet cost ÷ usable transfers. For a finished-shirt selling price, also include the garment, delivery allocation, cutting and pressing labour, test pieces, packaging and other business costs. Our printed T-shirt pricing guide explains the wider calculation.
Volume discounts are based on ordered film area in square metres, not the number of logos. A 58 × 100 cm sheet contributes 0.58 m² whether it contains five designs or fifty. Check the current qualifying thresholds and discount in the cart.
Your final approval checklist
Before approving the sheet, work through the job list one more time:
- Every design has the correct width, height and aspect ratio.
- Each size/version appears the required number of times.
- Sheet copies have not accidentally multiplied the order.
- Backgrounds, fine details, names and spelling have been checked.
- No artwork overlaps or extends beyond the printable boundary.
- There is practical cutting and handling space.
- The chosen product suits your garment and application equipment.
- You have planned a suitable test and recorded the approved layout.
For an important job, have another person check it. It is surprisingly easy to see the name you expect instead of the name actually typed.
Pressing cotton and polyester correctly
Standard Insta-Peel gang-sheet transfers need a heat press. The following settings are our current starting instructions; test the exact transfer, garment and press before running the complete job. Instructions supplied for the particular product take precedence.
| Fabric | Temperature | First press | Pressure | Peel | Final press |
|---|---|---|---|---|---|
| Cotton and most suitable fabrics | 160°C | 8 seconds | Firm | Immediately while hot | 10 seconds at 160°C |
| Polyester | 120°C | 30 seconds | Firm | Cold peel only: cool completely | 10 seconds at 120°C |
- Prepare the garment: remove lint and pre-press until the print area is dry and flat.
- Position the transfer: put the printed adhesive side against the fabric and the clear film upwards. Keep seams, pockets and zips from disrupting pressure.
- Cover and press: use a suitable clean cover sheet and the tested settings for that garment.
- Peel for the fabric: immediate hot peel for the general cotton process; allow polyester to cool completely before peeling.
- Finish: cover the exposed print and complete the final press, then let the garment cool before handling.
If details lift with the carrier, stop and investigate before continuing through the order. Repeatedly adding heat without finding the cause can damage a garment. Polyester deserves particular care: a lower temperature does not guarantee freedom from dye migration, glossing or shrinkage.
Keep the full fitting instructions beside your press. Our moisture guide and pressing tips explain common application variables. Specialty and iron-on products have their own methods.
For repeatable work, record the garment brand/style and colour, transfer, settings, peel and outcome. Keep a reference sample and follow the garment care instructions. Our technology-testing guide explains why appearance straight off the press is only part of assessing a transfer.
Cutting, storing and repeat orders
Unroll the sheet on a clean, dry surface and sort the pieces as you cut. Keep similar sizes labelled and bundle complete front/back sets where that helps your workflow. Protect unused transfers from contamination and moisture; see our transfer storage guide.
Keep your own master artwork, filenames, dimensions, quantities and job records for reorders. A screenshot is useful for reference but does not replace the original print file. Recheck the product and instructions when ordering again, especially if the garment or transfer has changed.
Frequently asked questions
Can I put different designs on one gang sheet?
Yes. You can mix designs, sizes, names and repeated copies on the same standard sheet, provided each file is suitable for that product and the complete layout fits.
Do all the designs need to be the same colour?
No. Standard DTF supports full-colour artwork on the shared sheet. A screen preview is not an exact colour proof; test a printed sample if colour is critical.
Should I make the whole gang sheet myself?
You do not need to create a combined layout to use the Auto Builder. Prepare the individual images, enter their sizes and quantities, then review its arrangement. Choose Manual Builder if you want to place the artwork yourself.
Can I change the design size in the builder?
Yes, but enlarging a raster image reduces its effective resolution. Check the displayed dimensions and inspect fine detail after any change. Use a different version when a small logo needs simpler artwork.
How many transfers fit on a one-metre gang sheet?
There is no fixed count. It depends on the width, design sizes, shapes, quantities and spacing. The square-logo calculation above is an illustration; your reviewed builder layout is the relevant result for your order.
Can I use a household iron on a standard gang-sheet transfer?
No. Order the dedicated iron-on product if you need to apply transfers with a household iron. Standard gang sheets require a suitable heat press.
Can specialty finishes or black adhesive be added to a standard gang sheet?
Our specialty finishes are separate sheet products, and black adhesive is a standard cut-sheet option. Choose the correct product before designing the layout.
How long will my order take, and can I collect it?
Standard handling is typically 3–5 business days; delivery time is additional. Same/Next Day handling is currently coming soon. Local pickup is from the laneway between 21 and 17 Castlemaine St, the second roller door on the right. The postal address is 17 Castlemaine St, Coorparoo QLD 4151. Check the live dispatch and delivery policy and wait for collection confirmation before visiting.
Ready to plan your sheet?
Start with the garment sizes, make your job list and prepare the files. Then build your DTF gang sheet and check the final layout against that list. If you are new to our standard transfers, the free sample pack is a useful way to try the product before a larger order.
Have a question before you start? Contact our Coorparoo team for help choosing the appropriate transfer product.
About the author: David Seth owns DTF Transfers Australia and The Custom T Shirt Shop group. DTF Transfers Australia has supplied ready-to-press transfers since 2020. Learn more about the team and production process on our About page.
