
DIY DTF Transfers Australia: A Practical Beginner’s Guide
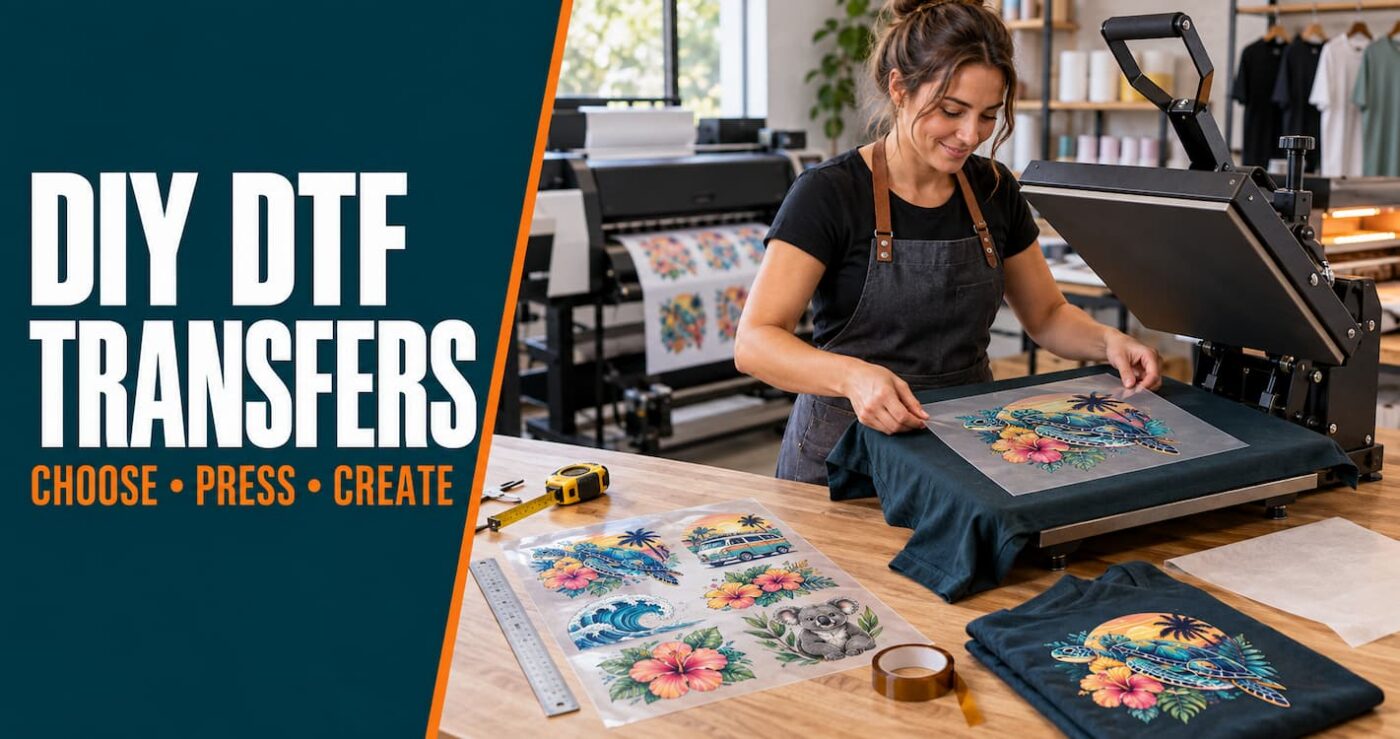
Small-business owner positioning a ready-to-press DTF transfer on a T-shirt beside a heat press and gang sheet

First published:  |  Last updated:

DIY DTF transfers let you create full-colour custom T-shirts, hoodies, tote bags and other apparel without screen-printing equipment or vinyl weeding. However, “DIY DTF” can describe three very different setups: pressing professionally printed transfers, using transfers designed for a household iron or craft press, or producing the transfers yourself with a DTF printer.

For most beginners and small apparel businesses, the simplest route is to order print-ready DTF transfers and apply them with a quality heat press. You keep control of the artwork, garment and placement while the specialist supplier handles printing, white ink, adhesive and curing.

At a glance

  • Best option for most people: order professionally made, ready-to-press DTF transfers and apply them with a heat press.
  • For occasional home projects: choose an iron-on DTF product specifically designed for a household iron or maker-style press.
  • For established production: owning a DTF printer can make sense when regular volume supports the equipment, maintenance, workspace and quality-control demands.
  • Standard transfers, specialty transfers and iron-on transfers are not automatically interchangeable.
  • There is no universal pressing setting. Follow the instructions supplied for the specific transfer and test your garment and equipment.
  • Print-ready artwork should generally be a transparent PNG at 300 DPI at the final size.
  • A reliable DIY workflow depends on consistent time, temperature and pressure—not guesswork.

What are DIY DTF transfers?

DTF means direct to film. The artwork is printed onto a specialised film using colour and white ink. A hot-melt adhesive is applied and cured, creating a transfer that can be positioned on a compatible garment and applied with heat and pressure.

The person decorating the garment does not necessarily need to own the printer. A transfer specialist can produce the film, ink, adhesive and cured transfer; you then complete the final application. This “we print, you press” model is what makes professional-looking DIY apparel accessible without turning your home or workshop into a printing factory.

DTF is particularly useful for:

  • full-colour logos and illustrations;
  • short runs and one-off garments;
  • multiple designs or sizes on one gang sheet;
  • cotton, polyester and many common blends;
  • front, back, sleeve and neck-label placements; and
  • small brands that want to decorate garments as orders arrive.

Fabric finishes, dyes, coatings, seams and heat sensitivity can affect the result. Test unfamiliar garments before committing to a customer order or full production run.

The three ways to approach DIY DTF

DIY routeWhat you doBest suited toMain limitation
Ready-to-press transfer and heat pressPrepare artwork, order transfers and press the garmentsStart-ups, creators and commercial apparel decoratorsRequires a dependable heat press and testing
Purpose-made iron-on DTFApply a specially selected transfer with a dry household iron or maker pressPersonal projects, gifts and occasional home useLess repeatable heat and pressure than a commercial press
Print DTF transfers yourselfPrint, powder, cure, test, maintain equipment and pressEstablished businesses with regular production demandHigher cost, maintenance, training and workspace requirements

Option 1: Order ready-to-press transfers

This is the most practical entry point for most people. You supply correctly prepared artwork, choose the transfer size or build a gang sheet, and receive a finished transfer ready for application.

You avoid the most demanding parts of DTF production:

  • white-ink circulation and printhead maintenance;
  • colour profiling and RIP software;
  • adhesive application and curing;
  • film, ink and powder compatibility testing;
  • nozzle checks, cleaning cycles and waste ink; and
  • rejects caused during transfer production.

You can start with individual DTF T-shirt transfer sheets or arrange multiple images efficiently on a custom DTF gang sheet.

Option 2: Use purpose-made iron-on DTF transfers

If you do not own a heat press, choose a transfer specifically supplied for household-iron or maker-press application. Do not assume an ordinary commercial or specialty DTF transfer will work reliably with an iron simply because both products use heat.

A household iron has a small heating area, fluctuating temperature and no measured pressure. Application therefore takes longer and depends heavily on technique. Our iron-on DTF transfer guide explains the equipment, pressing method and limitations in more detail.

Option 3: Print the transfers yourself

Owning a DTF printer gives you direct production control, but it is not the beginner shortcut that some online videos suggest. Printing is only one part of the workflow. You also need to manage ink, film, adhesive, curing, colour, software, cleaning, waste and quality testing.

A small desktop unit may reduce the initial footprint, but it does not remove the need for white-ink maintenance or a safe, repeatable curing process. Before purchasing, read our guide to buying a DTF printer, including the risks of unsupported equipment and crowdfunded machines.

Which DIY DTF option is best for beginners?

For most beginners, order the transfers and learn to press them well.

This lets you develop the skills that directly affect the finished garment:

  • choosing suitable blanks;
  • creating print-ready artwork;
  • sizing and positioning designs;
  • testing temperature, time and pressure;
  • recognising moisture and dye-migration problems; and
  • finishing, inspecting and costing each garment.

Once your order volume is consistent, you can compare the true cost of outsourcing transfers with the full cost of operating a printer. Buying production equipment before you have regular demand can turn a flexible side business into an expensive maintenance commitment.

What equipment do you need for ready-to-press DTF?

Essential equipment

  • A suitable heat press: it should provide consistent temperature and even pressure across the entire design.
  • A stable workbench: large enough to load garments without dragging them across the floor or equipment.
  • A cover sheet: use the finishing sheet, parchment or baking paper specified in the supplied instructions.
  • A lint roller: especially useful for removing lint and loose fibres before pressing.
  • Heat-resistant tape: helpful for hats, small placements and garments that are difficult to load.
  • Measuring tools: a ruler, centre guide or placement template improves repeatability.

Useful quality-control equipment

  • A reliable temperature-testing method for checking the platen.
  • Pressing pillows or pads for appropriate garments with seams or raised areas.
  • Clearly labelled containers for sorted transfer sizes and jobs.
  • Test garments or fabric pieces for unfamiliar materials.

Heat press, craft press or household iron?

Heat sourceBest useWhat to understand
Commercial heat pressProducts being sold and repeat productionMost repeatable option when maintained, tested and correctly adjusted
Maker-style pressHobby use and appropriately selected transfersPressure is manually controlled and the platen may be smaller than the design
Household ironPurpose-made iron-on transfersRequires section-by-section application and is less consistent than a heat press

How to apply DIY DTF transfers

The instructions supplied with the transfer always take priority. Different films, adhesives, garment fabrics and peel methods require different settings.

  1. Inspect the garment. Confirm its fabric composition and check for coatings, zips, pockets, seams or heat-sensitive panels.
  2. Test when needed. Use a sample or an inconspicuous area when working with an unfamiliar garment.
  3. Set and check the press. Do not assume the displayed temperature matches the entire platen.
  4. Prepare the garment. Lint-roll the print area and pre-press until moisture and steam are removed.
  5. Position the transfer. Place the adhesive side against the fabric and measure the placement. Secure it with heat-resistant tape if required.
  6. Cover and press. Use the specified time, temperature and pressure for that transfer and garment.
  7. Peel correctly. Hot, warm, instant and cold-peel films are not the same. Follow the supplied peel method.
  8. Complete the finishing press. If instructed, cover the design and press again for the specified time.
  9. Inspect the result. Check edges, fine details and overall bonding before the garment is sold or packed.

Important: there is no responsible universal DTF temperature and time. Settings that suit a cotton tee and one transfer film may damage polyester or fail with another adhesive system.

How to prepare artwork for DIY DTF transfers

DTF can reproduce detailed, full-colour artwork, but it prints the file you supply—including unwanted backgrounds, rough edges and stray pixels.

For DTF Transfers Australia, prepare your artwork as follows:

  • PNG format with a genuinely transparent background;
  • 300 DPI at the final intended print size;
  • cropped tightly around the artwork;
  • no element narrower than four pixels, with approximately 1 mm preferred for dependable fine detail;
  • maximum file size of 254 MB; and
  • correct spelling, orientation, colour and dimensions before upload.

Do not enlarge a small web image and expect it to become print-ready. Enlarging spreads the existing pixels over a greater area. If your original is too small, read our guide to AI artwork upscaling for DTF printing, then inspect every edge, face, letter and fine detail before ordering.

Use our DTF transfer size guide to select suitable widths for children’s, fitted and adult garments. A paper mock-up printed at actual size is one of the simplest ways to catch a poor size or placement before production.

Should you buy a DTF printer?

Consider purchasing a printer only when the operational benefit justifies the complete system—not because the printer itself appears affordable.

A working DTF production setup may require

  • a dedicated DTF printer with reliable white-ink management;
  • compatible inks and transfer film;
  • hot-melt adhesive and a controlled application method;
  • a shaker and curing oven or another validated curing system;
  • RIP software and usable colour profiles;
  • a quality heat press;
  • ventilation or extraction appropriate to the materials and process;
  • cleaning fluid, swabs, filters, waste containers and spare consumables;
  • space for printing, curing, cutting, storage and packing; and
  • time for daily checks, maintenance, testing and rejected output.

Why white ink changes the equation

White pigment can settle and create ink-flow or nozzle problems. Commercial systems use circulation and maintenance routines to manage this, but they still require operator attention. A machine sitting unused may cost more in ink, cleaning and downtime than its owner expected.

Ask potential suppliers to demonstrate:

  • start-up, shutdown and daily maintenance;
  • white-ink circulation and recovery procedures;
  • nozzle checks and cleaning costs;
  • the complete powdering and curing workflow;
  • software, colour management and technical support;
  • replacement printhead and service availability in Australia;
  • warranty exclusions and required consumables; and
  • real production samples that have been pressed and wash-tested.

Do not judge a system only by a freshly printed demonstration transfer. Its value is determined by repeatable output, uptime, support and the life of the finished garment.

DTF safety and workspace considerations

Printing your own transfers introduces inks, cleaning fluids, adhesive materials, heat and airborne contaminants. Obtain the current safety data sheet for every chemical and consumable, read it before use and apply the controls specified by the manufacturer.

Safe Work Australia explains the role of safety data sheets in identifying chemical hazards, safe handling, storage, emergency procedures and required controls.

A suitable production area should consider:

  • ventilation and local extraction based on the materials and SDS;
  • appropriate personal protective equipment;
  • clean chemical and consumable storage;
  • safe handling and disposal of waste ink and cleaning fluid;
  • fire and burn risks around presses and curing equipment;
  • separation from children, pets and food preparation; and
  • electrical capacity and the installation requirements of the equipment.

Use purpose-built curing equipment rather than an appliance used for preparing food. If you employ staff or operate commercially, check the work health and safety requirements that apply in your state or territory.

How to cost a DIY DTF apparel business

Avoid relying on an old online price list or comparing only the blank garment and transfer. Prices change, and the true cost of a finished shirt includes more than materials.

Allow for:

  • the blank garment;
  • the transfer and unused gang-sheet space;
  • freight and collection time;
  • artwork preparation;
  • pressing, finishing and packing labour;
  • test garments and production failures;
  • equipment depreciation and maintenance;
  • electricity and workshop overheads;
  • packaging, payment fees and selling costs;
  • tax obligations; and
  • a margin that supports reprints and future growth.

Ready-to-press transfers make many of these costs easier to predict because printer maintenance and transfer-production waste remain with the supplier. Gang sheets can further reduce transfer cost when they are filled efficiently with useful artwork rather than ordered merely because the sheet is available.

Common DIY DTF mistakes

Buying a printer before proving demand

Start by outsourcing transfers and measuring your actual weekly volume. Printer ownership becomes easier to assess once you know what you sell, how often you print and where outsourcing genuinely limits the business.

Using a standard transfer with a household iron

Choose a product designed for the application equipment. A standard or specialty transfer may require pressure and temperature consistency that a domestic iron cannot provide.

Treating the press display as a calibration certificate

The displayed temperature may not represent the complete platen. Cold areas, pressure variation and inaccurate sensors can create partial adhesion even when the screen shows the recommended setting.

Skipping the moisture-removal pre-press

Garments absorb moisture from the air. Pre-press until steam is no longer being released, while respecting the garment’s heat tolerance.

Using the wrong peel method

Instant-peel, hot-peel, warm-peel and cold-peel films behave differently. Peeling at the wrong stage can lift fine details or distort the print.

Ignoring dye migration

Some polyester dyes can move into the print when heated, especially in sublimated or strongly coloured garments. Use suitable materials, lower-temperature processes where specified and a production test before accepting the job.

Selling without testing

Press and wash-test representative garments when using a new blank, transfer, press or setting. A print looking correct immediately after application does not prove long-term adhesion.

Using poor artwork

DTF will not correct fuzzy edges, unwanted boxes, compression artefacts or spelling mistakes. Review artwork at final print size and remember that it will be produced as supplied.

Frequently asked questions

Can you make DIY DTF transfers without owning a printer?

Yes. Order professionally printed ready-to-press transfers, then apply them to your own garments. This is the easiest way to begin because you do not need to operate or maintain a DTF printer.

Can I use a household inkjet printer to make DTF transfers?

Not as a normal paper-printing task. Textile DTF uses specialised pigment inks, including white ink, compatible film, RIP software, adhesive and controlled curing. Converting an ordinary printer can create reliability, support and safety problems and is not equivalent to a purpose-built production system.

Do I need a heat press for DIY DTF?

A quality heat press is the preferred option for repeatable commercial work. For personal projects without a press, use a purpose-made iron-on DTF transfer and follow its specific instructions.

Can a Cricut EasyPress apply DTF transfers?

It can apply some transfers, but the product must be suitable for a manually pressured maker press. The operator must provide consistent pressure and cover the entire design correctly. Do not assume every standard or specialty DTF transfer is compatible.

What artwork file is best for DIY DTF transfers?

A transparent PNG at 300 DPI at the final print size is the safest general choice. Crop it tightly, remove stray pixels and avoid details that are too fine to print and adhere reliably.

Is it cheaper to print your own DTF transfers?

Not automatically. Owning a printer adds equipment, ink, film, adhesive, software, curing, cleaning, waste, maintenance, labour and downtime. It becomes economical only when suitable production volume and workflow outweigh those costs.

Are DTF transfers suitable for every fabric?

No transfer method is suitable for every garment. DTF works well on many cotton, polyester and blended fabrics, but coatings, dyes, stretch, texture and heat sensitivity can affect the result. Test unfamiliar materials first.

Where can I order ready-to-press DIY DTF transfers?

DTF Transfers Australia produces custom transfers and gang sheets in Brisbane for delivery across Australia, with local collection available. If you are unsure which transfer suits your garment or equipment, contact us before ordering.

The bottom line

The easiest way to start with DIY DTF is to outsource the transfer production and become excellent at artwork, garment selection, placement and heat pressing. This delivers professional capability without taking on white-ink maintenance, chemical handling and the complete printer workflow.

Use purpose-made iron-on transfers for occasional projects without a heat press. Consider buying a DTF printer only when regular demand, a suitable workspace and the willingness to maintain the equipment make it a sound production decision.

DIY should mean choosing how much of the process you want to control—not assuming you need to own every machine from the first day.


About this guide: David Seth has worked with screen printing and garment decoration since the 1990s and founded DTF Transfers Australia in 2020. This guide reflects practical experience producing transfers, pressing apparel and helping Australian businesses choose equipment and workflows appropriate to their production needs.

Call Now Button