
Artwork and Files
AI Upscaling for DTF Printing: A Practical Artwork Guide
Jan
First published: 29 January 2024 | Last updated: 24 September 2026 | By: David Seth
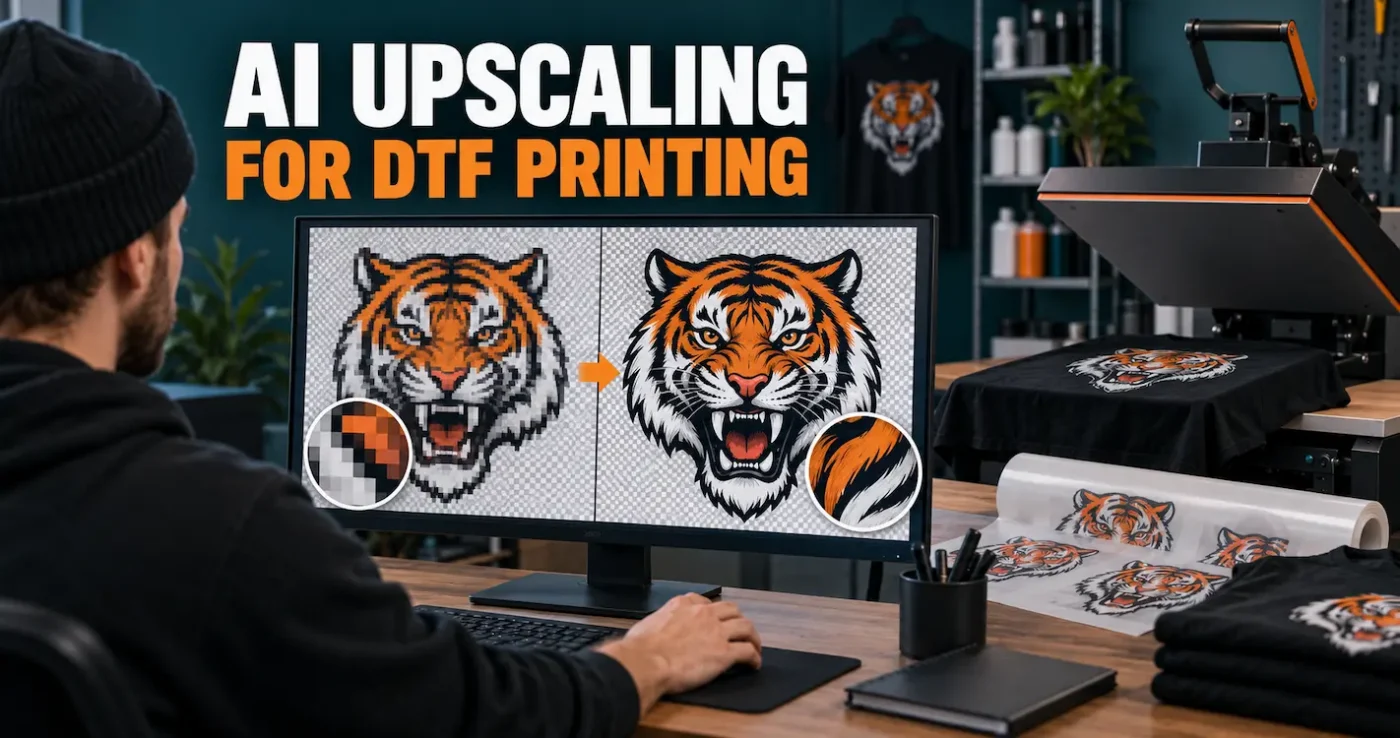
Short answer: AI upscaling can improve a small or slightly soft image before DTF printing, but it cannot recover missing information with certainty. The software predicts new pixels. That prediction may sharpen useful detail—or invent detail that was never present in the original.
Before enlarging anything, calculate how many pixels the artwork needs at its finished print size. After upscaling, inspect text, faces, logos, edges, transparency and fine elements at 100% view. A file is not print-ready simply because an AI tool made it larger or sharper.
At a glance
- DTF artwork should be supplied as a tightly cropped transparent PNG at 300 DPI at the intended print size.
- Changing a file from 72 DPI to 300 DPI does not create detail unless the image is resampled.
- AI upscaling is best for photographs, painted artwork and complex raster images that are only moderately undersized.
- Vectorising is normally better for simple logos, flat colours and clean line art.
- Manual redrawing is safer when lettering, dates, phone numbers, brand marks or exact geometry must remain correct.
- Free tools can be useful, but every result still needs human inspection.
- DTF Transfers Australia prints artwork as supplied; routine repair, spelling checks and background removal are not included.
What is AI upscaling?
AI upscaling enlarges a raster image and uses a trained model to estimate what the additional pixels should look like. Conventional resizing blends or interpolates the pixels already present. An AI model can go further by attempting to rebuild apparent edges, texture and detail.
That can make a slightly soft photograph, compressed illustration or undersized customer file more usable at a larger print size. It works best when the source still contains recognisable shapes and enough structure for the software to follow.
The process remains predictive. If a face contains only a handful of pixels, a word is unreadable or a logo corner has vanished into JPEG compression, there is no hidden original for the program to uncover. The tool creates a plausible interpretation.
For DTF printing, the goal is not merely a large file. The goal is an accurate image at the intended physical size with clean edges, genuine transparency and details robust enough to print, transfer and wash reliably.
Upscaling is not the same as generating new artwork
Upscaling should preserve the subject and improve its usable dimensions. Generative image editing may replace or reinterpret parts of the design. That difference matters when the artwork includes a real person, customer logo, product, vehicle, uniform, memorial image, date or name.
If you want to create a new image rather than repair an existing one, read our guide to creating T-shirt designs with AI image generation. The workflows overlap, but they solve different problems.
Should you upscale, vectorise or redraw?
Choosing the right method before you begin often saves more time than trying several enhancement settings on the wrong type of file.
| Source artwork | Best starting method | Why | Main risk |
|---|---|---|---|
| Photograph or painted artwork | AI upscaling | Preserves complex colour, shading and texture better than tracing | Invented facial or surface detail |
| Simple logo or flat illustration | Vectorising or manual redraw | Produces scalable, controllable shapes and clean edges | Automatic tracing may distort letters and corners |
| Logo containing important text | Obtain the vector master or redraw | Wording and spacing need to remain exact | AI can create convincing but incorrect characters |
| Slightly undersized clean raster design | Moderate AI upscale or quality resampling | Only a limited increase is required | Oversharpening and edge halos |
| Tiny screenshot or messaging preview | Request the original | The preview may have discarded most of the useful information | A larger file that is still inaccurate |
| Damaged historic or memorial photo | Conservative restoration plus manual checking | Identity is more important than artificial sharpness | Changing the person’s face or expression |
A vector is not automatically better than a raster image. Photographs and artwork with natural shading are normally best kept as high-resolution raster files. Clean logos benefit from vectors only when the paths accurately reproduce the original.
DTF Transfers Australia requires the final upload as a transparent PNG. You can repair or create a design in vector software, then export it as a correctly sized PNG for ordering.
How many pixels does DTF artwork need?
Resolution only has meaning when connected to print size. Changing the resolution field from 72 DPI to 300 DPI without adding pixels does not improve detail. It simply changes the physical size at which the existing pixels are described as printing.
Use this calculation:
Required pixels = print size in inches × 300
To convert millimetres to inches, divide the millimetres by 25.4:
Required pixels = print size in millimetres ÷ 25.4 × 300
| Finished artwork width | Approximate pixels required at 300 DPI | Typical use |
|---|---|---|
| 100 mm | 1,181 px | Small chest logo or sleeve print |
| 200 mm | 2,362 px | Medium front print |
| 250 mm | 2,953 px | Common adult front print |
| 280 mm | 3,307 px | Wide print for a 280 mm gang sheet |
| 300 mm | 3,543 px | Large adult front or back print |
| 350 mm | 4,134 px | Oversized print |
| 380 mm | 4,488 px | Large-format artwork where supported |
These figures are targets, not proof of image quality. A blurry 500-pixel image enlarged to 4,000 pixels becomes a larger file, but it does not suddenly contain an accurate high-resolution original.
Worked example: is this file large enough?
Imagine a customer supplies an 800-pixel-wide logo and wants it printed 250 mm wide.
- A 250 mm print needs approximately 2,953 pixels at 300 DPI.
- Divide 2,953 by the supplied width of 800 pixels.
- The design needs to be enlarged by approximately 3.7 times.
If the artwork is a photograph or detailed illustration with clear source information, a careful 4× AI upscale may be worth testing. If it is a company logo containing small wording, a 3.7× AI enlargement is a warning sign. Request the original vector file or redraw the logo accurately instead.
Now consider a 2,400-pixel image needed at the same 250 mm width. It requires only a 1.23× increase. That is a far more realistic candidate for controlled upscaling.
Practical rule: calculate the enlargement factor before choosing the tool. The more information the file is missing, the more carefully you must question anything the software appears to “recover”.
When AI upscaling works well
AI upscaling is most useful when the source is slightly too small rather than severely damaged. Suitable candidates include:
- a clear photograph that needs a moderate 2× enlargement;
- digital artwork saved below the required dimensions but with recognisable detail;
- a mildly compressed image whose important edges remain well defined;
- a scanned illustration with light noise or softness; and
- artwork created for a smaller garment that now needs a controlled increase.
The best result normally comes from the least-damaged source. Ask for the original camera file, design export, cloud download or editable artwork before repairing a screenshot or social-media copy.
When upscaling cannot rescue the artwork
Some files need redrawing, replacement or a smaller finished print. Warning signs include:
- text that is already unreadable;
- logos with missing corners, merged letters or incorrect proportions;
- faces with no distinct eyes, mouth or facial structure;
- heavy JPEG blocks around every edge;
- motion blur or incorrect camera focus;
- a screenshot containing interface icons or a patterned background;
- an image repeatedly sharpened, enlarged and resaved; and
- tiny graphics taken from a website preview.
Generative models can produce convincing replacements for missing features, but accuracy matters in customer artwork. A rebuilt face may no longer resemble the person. An altered vehicle badge or animal pattern may be wrong. A guessed letter can change a name, date, web address or phone number.
When exactness matters, obtain a reliable reference and recreate the element manually. Do not approve a result simply because it looks sharp on screen.
Choosing an upscaling or artwork tool
Software changes quickly. Choose according to the artwork, privacy requirements and amount of manual control you need rather than assuming one application is best for everything.
Topaz Gigapixel and Topaz Photo
Topaz provides different approaches for photographs, graphics, face recovery, text preservation and difficult low-resolution sources. Its reconstructive models can create convincing texture, but important details still need comparison with the source.
Adobe Photoshop, Camera Raw and Lightroom
Photoshop includes Generative Upscale, while Camera Raw and Lightroom provide enhancement and resolution tools. Photoshop is particularly useful after upscaling because you can compare layers, repair individual areas, manage masks and export a transparent PNG at the exact required dimensions.
Upscayl
Upscayl is a free, open-source desktop upscaler available for Windows, macOS and Linux. The desktop version can process images locally, which may suit artwork that should not be uploaded to an unknown online service. Results still depend on the source and selected model.
Vectorizer.AI and similar tracing tools
Automatic vectorisation can be a better route for simple logos, silhouettes or flat illustrations. Whatever tool you use, zoom in and inspect curves, corners, holes inside letters, colour boundaries and the number of generated paths.
Photopea
Photopea is a browser-based image editor with a Photoshop-like workflow. It is useful for sizing, layer and mask work, background removal, edge cleanup and transparent PNG export. It is best treated as the editing and checking stage rather than a guaranteed replacement for a specialist AI upscaler.
Our step-by-step guide to using Photopea for print-ready DTF artwork explains the broader workflow.
Privacy before convenience
Before uploading customer artwork to any online tool, review how the service stores, processes and uses files. Avoid sending confidential branding, unreleased products, private photographs or licensed client assets to a service unless its terms are appropriate and you have authority to do so.
A free Upscayl and Photopea workflow
This workflow is useful for customers who do not have Photoshop or commercial upscaling software.
- Obtain the best original. Avoid screenshots and messaging-app previews.
- Calculate the required pixels. Decide the finished width first, then use the 300 DPI formula above.
- Keep an untouched copy. Never overwrite the only source file.
- Upscale conservatively in Upscayl. Select a model appropriate to the image and create only the enlargement required.
- Compare the result with the original. Check names, faces, logos, repeated patterns and fine edges before editing further.
- Open the enlarged image in Photopea. Use layers or masks to clean unwanted areas rather than permanently erasing everything at once.
- Remove the background if required. Automatic removal is a starting point. Inspect hair, smoke, distressing and soft shadows manually.
- Set the final dimensions. Confirm the pixel size and intended physical print size rather than changing the DPI number alone.
- Inspect on contrasting backgrounds. Check against black, white and a bright colour for halos and stray pixels.
- Crop tightly and export as PNG. Reopen the exported file and inspect the actual upload—not only the working document.
A free workflow can produce good results from a suitable source. It does not remove the need for judgement, and it may take longer than obtaining the correct original file.
Step-by-step professional DTF upscaling workflow
- Find the best source: obtain the original export, photograph or design file.
- Decide the finished print size: record the width and height in millimetres before changing the image.
- Calculate the required pixels: target 300 DPI at the intended size.
- Assess the enlargement factor: determine whether the missing information is realistic to estimate.
- Choose the method: upscale complex raster artwork, vectorise suitable flat artwork or redraw exact elements.
- Protect the source: keep an untouched copy and work non-destructively where possible.
- Start moderately: compare a controlled version before applying the strongest enhancement.
- Compare at 100%: review the source and result side by side. Fit-to-screen previews hide defects.
- Repair individual problems: correct lettering, eyes, hands, borders and repeated patterns manually.
- Clean the background: inspect the complete silhouette against contrasting colours.
- Check printable detail: remove weak isolated specks and elements below practical production size.
- Set the final physical size: confirm the enlarged pixels provide 300 DPI at the required dimensions.
- Crop and export: save a tightly cropped transparent PNG below 254 MB.
- Reopen the PNG: confirm the exported upload file has the correct transparency, size and orientation.
- Order a test: for valuable garments, important colour or repeated production, test before the full run.
What should you inspect before printing?
| Check | What can go wrong | What to do |
|---|---|---|
| Text and numbers | Letters merge, change shape or become invented symbols | Retype important wording using the correct font where possible |
| Faces and hands | Identity, expression, fingers or jewellery change | Compare closely with the original and reduce generative processing |
| Logos | Proportions, spacing and trademark details drift | Use the authorised vector master or redraw accurately |
| Fine outlines | Sharpening creates double edges, noise or fragile isolated pixels | Clean edges and remove elements too small to transfer reliably |
| Gradients and shadows | Banding, blotches or false texture appear | Use a model suited to tonal artwork and compare versions |
| Colour | Enhancement changes saturation, contrast or neutral tones | Review the final file and test colour-critical work |
| Transparency | White halos, pale boxes or stray pixels remain | Inspect against multiple contrasting backgrounds |
Do not confuse a sharp edge with a printable detail. Follow our artwork specification for minimum practical line widths and avoid tiny isolated dots, narrow whiskers or distressed specks that may not carry enough adhesive to remain reliable.
Transparent backgrounds, halos and stray pixels
Background removal is often separate from upscaling. Automatic tools can leave semi-transparent pixels around hair, smoke, shadows and compressed edges. Those pixels may be invisible on a white editing canvas but print as a pale outline on a dark garment.
Use this check:
- Place the finished artwork over solid black.
- Repeat the check over white and a bright contrasting colour.
- Zoom in around the complete outside edge.
- Look for boxes, coloured fringes, dust and isolated pixels.
- Check holes inside letters and between separate design elements.
- Hide the test backgrounds before exporting the transparent PNG.
A checkerboard inside an editor indicates transparency, but it does not prove that every unwanted pixel has been removed. See our DTF artwork requirements and FAQs for more preparation checks.
DTF artwork pass-or-fail checklist
Before uploading the file, answer each question honestly:
- PASS: Is the artwork a transparent PNG?
- PASS: Does it contain enough pixels for 300 DPI at the intended print size?
- PASS: Is the canvas tightly cropped around the design?
- PASS: Is the file below 254 MB?
- PASS: Have all names, dates, numbers and logos been compared with a reliable original?
- PASS: Are the edges clean when viewed against black, white and a bright colour?
- PASS: Are the smallest elements thick and connected enough to print and transfer reliably?
- PASS: Have you reopened the exported PNG and checked the actual upload?
- PASS: Do you have the legal right to reproduce the artwork?
If any answer is no, the file is not ready simply because it has been upscaled.
Customer artwork responsibility
DTF Transfers Australia provides a budget print-as-supplied service. Routine manual artwork checking, spelling correction, background removal and AI repair are not included. The artwork submitted through the gang-sheet builder is the artwork produced.
AI upscaling does not provide copyright permission and does not make copied artwork original. Review our guide to avoiding copyright issues with T-shirt designs if a file contains someone else’s character, logo, photograph or artwork.
When you are confident the finished PNG is ready, place it at the correct size using our custom DTF gang-sheet builder. Do not enlarge it again inside the builder unless you recalculate the effective resolution.
AI upscaling for DTF printing FAQs
Can AI turn any low-resolution image into print-ready artwork?
No. AI can improve suitable files and create plausible detail, but it cannot guarantee recovery of information that is missing. Severely blurred text, damaged logos and tiny faces may need redrawing or a better source.
What resolution should DTF artwork be?
Supply a transparent PNG at 300 DPI at the intended print size. Check both the pixel dimensions and physical dimensions. A file labelled 300 DPI can still be too small if it does not contain enough pixels.
Does changing 72 DPI to 300 DPI improve an image?
Not by itself. With resampling disabled, the same pixels are assigned a smaller physical size. With resampling enabled, software creates additional pixels, but the quality depends on the original and enlargement method.
How do I calculate the pixels required for a DTF print?
Divide the finished size in millimetres by 25.4, then multiply by 300. A 280 mm-wide design requires approximately 3,307 pixels across at 300 DPI.
Should I upscale before removing the background?
It depends on the file. Upscaling first can provide more edge information, but it can also strengthen compression artefacts. If you already have a clean mask or transparent master, preserve it. Test both orders on difficult edges such as hair, smoke and distressed artwork.
Is vectorising better than AI upscaling?
Vectorising is normally better for suitable flat logos and clean line art. AI upscaling is usually better for photographs, paintings and complex tonal artwork. Automatic tracing is not suitable when it changes lettering, gradients or organic texture.
What is a good free AI upscaling workflow?
Upscayl can perform the initial desktop enlargement, while Photopea can be used for sizing, masking, background cleanup, edge inspection and transparent PNG export. Both stages still require close comparison with the original.
How much should I enlarge an image?
Enlarge only enough to reach the pixels required at the finished print size. A moderate increase is easier to control than an extreme one. Calculate the enlargement factor first and inspect the result after every stage.
Can upscaling fix a JPEG saved from Facebook or a messaging app?
It may reduce visible pixelation, but compression damage and missing information remain. Ask for the sender’s original file first. If it is unavailable, compare several conservative versions and check all wording and edges carefully.
Will DTF printing hide flaws in the artwork?
No. DTF can reproduce fine colour and detail, so unwanted pixels, rough cut-outs and incorrect AI-generated features may also be reproduced. A heat press cannot correct a problem already present in the file.
Does DTF Transfers Australia repair artwork before printing?
No. We provide a print-as-supplied service. Customers are responsible for resolution, transparency, spelling, sizing, legal reproduction rights and all other artwork details before ordering.
The best upscaling result starts with the best source
AI upscaling is now a valuable part of the DTF artwork toolkit. Current tools can create cleaner edges, more useful dimensions and convincing detail from files that would previously have been difficult to print. The improvement can be real, but it is not proof that the image is accurate or production-ready.
Start with the best original, calculate the pixels required at the actual print size, choose upscaling, vectorisation or redrawing according to the artwork, and inspect every important detail. When the final transparent PNG passes the checklist, it can be placed on a DTF sheet at the intended dimensions.
DTF Transfers Australia has produced ready-to-press transfers since 2020, backed by practical garment-printing experience dating back to the 2000s. This guidance reflects what matters when digital artwork moves from a screen into a real production workflow: correct size, clean transparency, printable detail and an honest assessment of the source.
Build a custom DTF gang sheet or review our DTF frequently asked questions before ordering.
