
Pressing and Care
DTF Transfer Printing onto Hoodies and Sweatshirts
May
How to Apply DTF Transfers to Hoodies and Sweatshirts
DTF transfers can create detailed, full-colour prints on many hoodies, crewneck sweatshirts and fleece garments. White ink allows the design to remain visible on dark colours, while ready-to-press transfers avoid the maintenance and equipment required to print and cure transfers in-house.
A hoodie is not simply a thicker T-shirt. Fleece holds moisture, pockets and seams interrupt pressure, drawcords and zips can be damaged, and the hood changes both pressing and print placement. This guide explains how to prepare, test and press these garments using our current Insta-Peel transfers.
TL;DR
- DTF works on many suitable cotton, polyester and blended hoodies, but the exact garment must be tested.
- Thick fleece can hold significant moisture. Pre-press and check for steam before positioning the transfer.
- Keep the hood, drawcords, zips, pocket seams and other obstructions outside the pressing area.
- Thread the garment onto the lower platen where possible so only the layer being printed is pressed.
- Use a suitable platen or pressing pillow to raise the print area above seams, but recheck effective pressure.
- For cotton and most suitable fabrics, start at 160°C for 8 seconds with firm pressure.
- For polyester-rich or heat-sensitive fleece, start at 120°C for 30 seconds, cold peel only, and test for dye migration and heat marks.
- Peel Insta-Peel film immediately while hot on cotton and most fabrics; on polyester, cold peel only after cooling completely. Then final press for 10 seconds (at 120°C on polyester).
- Check placement with the hood down and the garment being worn; the hood can cover a high back print.
- Test and document each garment style, colour and supplier batch before production.
Why Use DTF Transfers on Hoodies?
Hoodies and sweatshirts are popular for clothing labels, sports clubs, workwear, events and merchandise. DTF is useful because the same digital process can produce detailed artwork, gradients and multiple colours without cutting or layering each colour separately.
Useful DTF applications
- large full-colour front or back designs;
- small left-chest logos;
- sleeve graphics where the press and sleeve construction permit;
- short runs and mixed garment sizes;
- dark garments requiring opaque white; and
- several designs arranged on a DTF gang sheet.
DTF is not automatically suitable for every hoodie. Water-resistant coatings, highly heat-sensitive fibres, heavily textured surfaces, awkward seams and unstable polyester dyes can create problems. Test the transfer, garment and press as one combination.
Understand Hoodie and Sweatshirt Construction
The garment style determines which parts can lie flat and receive even pressure.
| Garment | Useful print areas | Main pressing issue |
|---|---|---|
| Pull-over hoodie | Front above the pocket, back, sleeves | Kangaroo-pocket seam, hood and drawcords |
| Crewneck sweatshirt | Large front, large back, left chest, sleeves | Thick fleece, ribbed panels and side seams |
| Full-zip hoodie | Left or right chest, back, sleeves | Centre zip prevents an ordinary design being pressed flat across the front |
| Quarter-zip sweatshirt | Left chest, lower front, back, sleeves | Zip and placket obstruct upper-centre pressure |
| Performance polyester fleece | Depends on garment construction | Heat marks, dye migration and coatings |
A crewneck usually provides the simplest flat front. A full-zip hoodie often needs two separate chest prints rather than one design crossing the zip. Do not press directly onto plastic zips, coated drawcord ends or other heat-sensitive components.
Check the Fabric and Garment Before Pressing
Read the fibre label and supplier decoration information, but do not rely on a single cotton percentage. Some fleece garments have a cotton-rich outer face and polyester-rich brushed interior; others use a fully polyester face. The stated total blend does not always describe how the printable surface behaves.
Cotton and cotton-rich fleece
These garments often accept DTF well, but thick fleece can retain moisture. Cotton surfaces may also show lint through very fine designs if not cleaned before pressing.
Polyester and polyester-rich fleece
Use the lower-temperature polyester starting process and test for dye migration, shine, flattening, shrinkage and colour change. Improved current adhesives make lower-temperature application more practical, but they do not eliminate the risks of an unstable garment dye or heat-sensitive construction.
Blends, elastane and specialty finishes
Stretch fibres, water-repellent treatments, stain-resistant finishes and unusual coatings can change adhesion and heat tolerance. If the surface repels moisture or feels heavily treated, do not assume the transfer will bond. Test before accepting production.
Initial garment test
- Choose a hidden area or spare garment from the same colour and batch.
- Apply the intended temperature, time, pressure and cover sheet without a transfer.
- Inspect for shine, compression, colour change, melting, puckering or distortion.
- If the empty garment changes unacceptably, source another garment or process.
For more information about material behaviour, read our T-shirt and garment fabric guide.
Manage Moisture and Lint in Fleece
Fleece and thick sweatshirting can absorb and hold more moisture than a lightweight tee. Moisture can interfere with adhesive bonding and cause inconsistent results.
Pre-press until the print area is dry
- Place the garment flat with the hood and other bulky areas outside the press.
- Pre-press the decoration area.
- Open the press and look for steam.
- If steam appears, allow it to escape and press again.
- Stop and reassess if the fabric becomes shiny, flattened or distorted.
Do not substitute excessive temperature for controlled drying. Polyester-rich fleece may require repeated shorter exposure at the tested lower temperature.
Remove loose fibres
Use a clean lint roller before positioning the transfer. Pay particular attention to fleece that sheds, pet hair, dust and packaging fibres. A particle trapped beneath the transfer can create a visible raised point or weak spot.
Manage Seams, Pockets, Zips and Drawcords
A transfer bonds only where the upper platen applies enough heat and pressure. A thick pocket seam outside the transfer can hold the platen up and reduce pressure across part of the design.
Thread the garment onto the platen
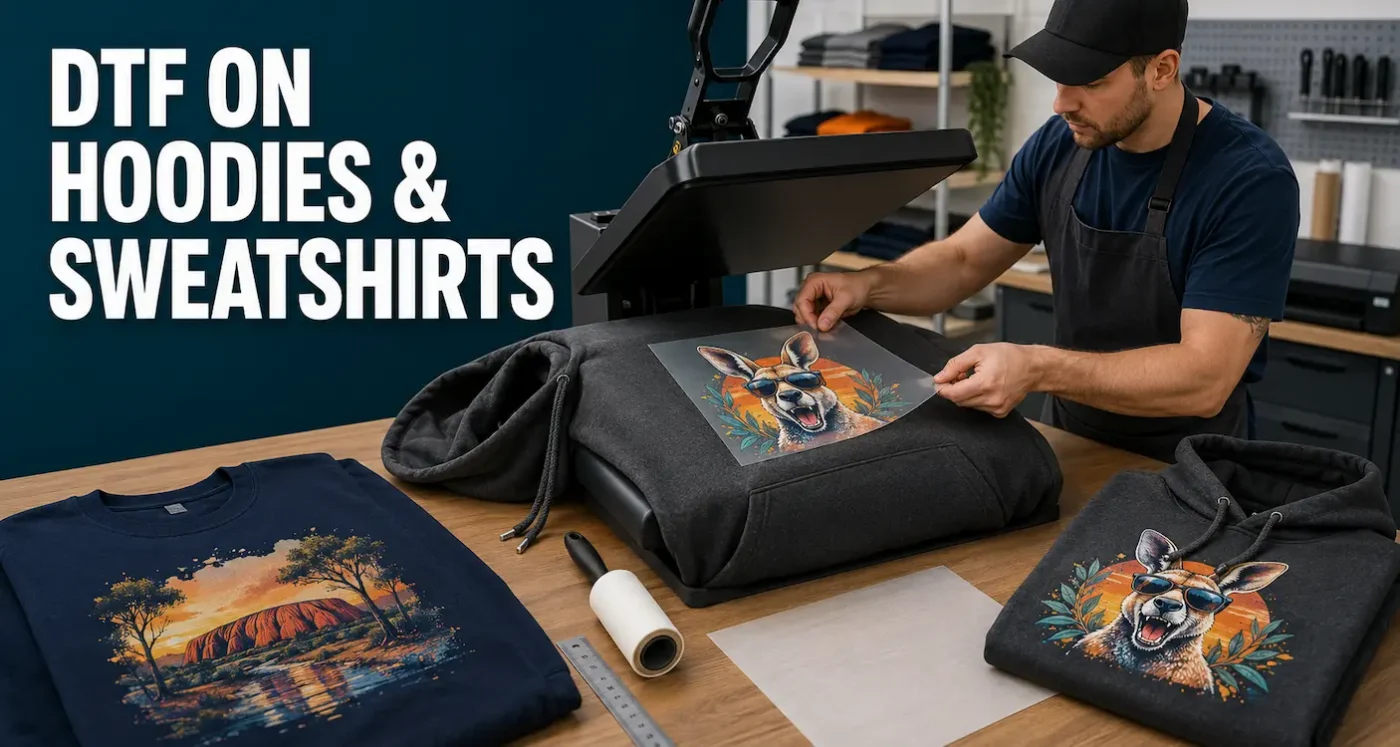
Where the press allows it, dress the hoodie over the lower platen so only the front layer sits on top. Move the back, hood and excess fabric underneath and away from the pressing area. This reduces bulk and avoids pressing through several garment layers.
Use a suitable smaller platen or pressing pillow
A smaller platen can fit inside the garment and between seams. A pressing pillow can raise the print area above nearby construction. The pillow compresses, so confirm that the transfer still receives the intended firm pressure.
Kangaroo pockets
Keep the transfer above the top pocket seam unless the press setup deliberately isolates a flat area. Large artwork positioned too low may cross the pocket opening or sit where the seam prevents even contact.
Zips and hardware
Do not close the press onto a zip, metal eyelet, cord lock or plastic tip. These items can be damaged and can also damage the platen or garment. Use a left-chest design, split artwork, specialist platen or another decoration position.
Choose the Right Print Size and Placement
Placement should be checked on the garment, not copied blindly from a T-shirt template.
Front designs
The hood opening, neckline and kangaroo pocket reduce the usable front area. Position the artwork visually between these elements, then confirm it is not covered by the wearer’s chin, hood or drawcords. Use a ruler or garment-specific placement template for repeat work.
Back designs
Place the hood in its natural down position before approving the design location. A print that looks correctly high while the hood is moved aside may be partly covered when worn. Some designs should begin lower than a standard crewneck back print.
Left-chest designs
Check the relationship to the zip, pocket, drawcord and wearer’s chest. A fixed measurement may not suit every size; scale and adjust placement across youth, adult and oversized garments.
Sleeve prints
Sleeves are tapered and may contain thick underarm seams or ribbed cuffs. Use a sleeve platen or pressing arrangement that supports the print area without placing the seam beneath the design.
Scale across garment sizes
One transfer size can look oversized on an extra-small hoodie and undersized on a 5XL. Create size groups where visual consistency matters, and label transfers clearly before production.
Prepare Artwork for Hoodie DTF Transfers
Supply a transparent PNG at the intended print size at 300 DPI or higher. Crop closely and avoid isolated details thinner than approximately 1 mm or four pixels.
Design for fleece and stretch
- Use negative space to reduce the feel of a very large transfer.
- Avoid placing important detail over pockets, zips or seams.
- Check that thin elements have enough printed area and adhesive to remain stable on a textured surface.
- Consider how the artwork will distort when the garment stretches or folds.
- Inspect semi-transparent shadows and glows over both light and dark backgrounds.
Review the complete DTF artwork requirements before ordering.
Starting Settings for Insta-Peel Transfers
These settings are general starting points for our current Insta-Peel transfers. Heat presses and garments vary, so test the complete combination before production.
| Garment starting category | Temperature | Initial press | Pressure | Peel | Final press |
|---|---|---|---|---|---|
| Cotton and most suitable fabrics | 160°C | 8 seconds | Firm | Immediately while hot | 10 seconds at the same temperature |
| Polyester-rich or heat-sensitive polyester fleece | 120°C | 30 seconds | Firm | Cold peel only — cool completely before peeling | 10 seconds at 120°C |
For blends, begin with the setting appropriate to the most heat-sensitive component and test adhesion. Do not automatically raise the temperature when a transfer lifts—first check moisture, pressure, seams and platen consistency.
Step-by-Step Insta-Peel Application
What you need
- Insta-Peel DTF transfer;
- tested hoodie or sweatshirt;
- heat press with a suitable platen or pillow;
- clean parchment paper, baking paper or Teflon cover sheet;
- lint roller;
- heat-resistant tape if required; and
- placement ruler or template.
Application process
- Prepare the press. Check the temperature and pressure. Fit the appropriate platen or pillow.
- Load the garment. Thread it onto the lower platen where possible. Move the hood, drawcords, zips and excess layers outside the pressing area.
- Remove lint. Roll the printable surface and inspect for debris.
- Pre-press. Remove wrinkles and moisture. Check for steam and repeat carefully until dry.
- Position the transfer. Place the printed adhesive side against the fabric with the clear film facing upwards. Check placement relative to the neckline, pocket, hood and seams.
- Add the cover sheet. Lower it gently without moving the transfer.
- Complete the initial press. Use the tested category settings and ensure the design receives even pressure.
- Peel immediately. Remove the film smoothly while hot. If an area lifts, place the film back down and repress before continuing.
- Final press. Cover the exposed print with a clean sheet and press for 10 seconds at the same temperature.
- Inspect. Check every edge, the fabric surface and print colour before packing.
Keep our complete Insta-Peel fitting instructions at the production station.
Test Before Hoodie Production
A transfer peeling successfully does not complete the test. Reproduce the full production and care process.
- Use a spare garment from the same style, colour and batch.
- Press the empty fabric first and inspect for heat or pressure marks.
- Apply the real design using the intended placement and platen setup.
- Record the press, temperature, time, pressure, pre-press and cover sheet.
- Inspect adhesion, fleece compression, colour and garment shape after cooling.
- For polyester-rich garments, inspect light print colours again after 24–48 hours for dye migration.
- Wait 24–48 hours, then complete repeated wash and wear testing.
Keep an approved sample and written recipe. Retest when the garment supplier, colour, batch, transfer or press changes.
Troubleshooting Hoodie and Sweatshirt Transfers
| Problem | Likely causes | What to check |
|---|---|---|
| Transfer lifts near the bottom | Kangaroo-pocket seam reducing pressure | Move the print higher or isolate the print area with a suitable platen or pillow |
| One edge lifts | Side seam, uneven platen, moisture or garment bulk | Thread the garment, check platen alignment and repeat the moisture test |
| Fleece looks shiny or crushed | Heat, pressure, cover-sheet texture or excessive total press time | Test the lowest suitable exposure and a different clean cover sheet |
| Light print changes colour | Dye migration from polyester-rich fleece | Use the 120°C starting process and evaluate another garment or blocker system |
| Small pinholes or raised marks appear | Lint or loose fibres trapped beneath the transfer | Lint-roll and inspect under good lighting before pressing |
| Print is covered when worn | Back placement approved with hood moved aside | Check artwork with the hood in its natural down position |
| Garment puckers around the print | Heat sensitivity, shrinkage or a very large solid transfer | Reassess garment suitability, artwork construction and total heat exposure |
Change one variable at a time and record the result. More heat is not always the solution, particularly when pressure or moisture caused the failure.
Garment Care After Applying Insta-Peel DTF
- Allow the garment to rest for 24–48 hours before washing.
- Wash inside out on a cool or cold gentle cycle.
- Do not use bleach.
- Air drying is recommended.
- Avoid tumble drying.
- Do not iron directly over the printed design.
Heavy fleece dries more slowly than a T-shirt. Allow it to dry fully before folding or storing. Commercial laundry and high-temperature drying require separate garment and transfer testing.
Tips for Repeatable Small-Business Production
- Group orders by garment style and tested press recipe.
- Label transfer sizes and placements before starting.
- Use garment-specific placement templates.
- Keep the hood and drawcords in the same safe position for every press.
- Inspect pocket and side seams before each garment is loaded.
- Replace dirty or creased cover sheets.
- Record failed transfers and their causes instead of hiding the waste in the average cost.
- Keep a spare blank for each production batch where possible.
Include the hoodie, transfer, freight, testing, application labour, rejected garments, packaging and overheads when pricing. Ready-to-press transfers can let you build demand without maintaining a DTF printer; read our guide to starting a T-shirt and apparel business with DTF.
Frequently Asked Questions
Can DTF transfers be applied to fleece hoodies?
Yes, many cotton, polyester and blended fleece hoodies accept DTF transfers. Test the printable surface for moisture, adhesion, heat marking, compression and dye migration before production.
What temperature should I use for a cotton hoodie?
For our current Insta-Peel transfers, start testing cotton and most suitable fabrics at 160°C for 8 seconds with firm pressure. Peel immediately while hot and final press for 10 seconds at the same temperature.
What settings should I use for a polyester hoodie?
Start testing at 120°C for 30 seconds with firm pressure. Cold peel only — cool completely — then final press for 10 seconds at 120°C. Check for delayed dye migration and heat marks. Always test on a spare garment first — heat presses and fabrics vary.
Can DTF be applied to any colour hoodie?
White ink allows DTF artwork to remain opaque on many light and dark garments. Colour does not determine suitability by itself; dark polyester dyes can migrate into light print areas, so the actual garment must be tested.
Can I use a household iron on a hoodie transfer?
A heat press is recommended for standard DTF because thick fleece needs consistent heat and pressure. If a heat press is unavailable, choose an iron-on DTF product with instructions specifically written for household irons or handheld presses.
How do I press above a kangaroo pocket?
Keep the design above the top pocket seam and use a platen or pressing pillow that raises the decoration area above the seam. Confirm that the transfer still receives firm, even pressure.
Where should a back print sit on a hoodie?
Check placement with the hood in its natural down position. A high back print may be covered, so hoodie artwork often begins lower than an equivalent crewneck design. Test the placement across garment sizes.
Why is steam coming from the hoodie during pre-pressing?
Thick fleece can retain moisture. Allow the steam to escape and repeat the pre-press carefully until the printable area is dry, while watching for shine, flattening or heat damage.
How soon can I wash the printed hoodie?
Allow the garment to rest for 24–48 hours. Wash it inside out using a cool or cold gentle cycle, avoid bleach and direct ironing, and air dry where possible.
Is DTF or vinyl better for hoodies?
DTF generally suits detailed, full-colour artwork without weeding. HTV can be efficient for simple names, numbers and specialty solid-colour finishes. Garment compatibility, design complexity, quantity and desired feel determine the better method.
Treat the Hoodie as Part of the Pressing System
DTF transfers can produce excellent hoodie and sweatshirt prints, but fleece moisture and garment construction need more attention than an ordinary flat T-shirt. Load the garment so the print area lies flat, keep obstructions outside the press, use the correct fabric starting settings and inspect the carrier peel and final press.
Test each garment style and colour, document the successful setup and check back-print placement with the hood down. When you are ready to produce, browse our ready-to-press DTF transfers or build a custom gang sheet for mixed hoodie designs and sizes.
