
DTF vs Other Methods
How DTF Transfer Technology Works: From Artwork to Garment
Sep
Short answer: DTF transfer technology converts digital artwork into a layered, ready-to-press transfer. RIP software prepares the colour and white channels, a printer deposits CMYK ink and a white backing onto coated film, an adhesive layer is added and cured, and heat plus pressure bond the finished design to a garment. The carrier film is then peeled away. Each part of that system affects colour, detail, feel, adhesion and consistency.
This article explains what happens inside the technology rather than repeating a general list of DTF benefits. It also separates two jobs that are often confused: manufacturing a DTF transfer and applying a finished transfer. Customers ordering from DTF Transfers Australia receive a printed, adhesive-coated and cured transfer. They do not need to print, add adhesive or cure it themselves.
DTF is a complete production system
DTF stands for Direct to Film. The name describes the first destination of the printed image: a coated carrier film. Unlike direct-to-garment printing, the printer does not print onto the shirt. Unlike screen printing, the decorator does not expose a separate physical screen for every colour. Instead, software and a digital printer build the image on film before it is transferred with a heat press.
The printer is important, but it cannot be judged in isolation. A repeatable DTF workflow depends on:
- correctly prepared digital artwork;
- RIP software and a suitable colour profile;
- a maintained printer and stable ink delivery;
- compatible CMYK and white inks;
- coated transfer film with predictable release behaviour;
- an adhesive matched to the ink and intended application;
- controlled curing;
- a consistent heat press; and
- a garment that tolerates the required heat and pressure.
If one stage changes, the finished result may change. A new film can affect ink reception and peel behaviour. A different ink can require new colour profiling. A new garment can alter the safest application temperature. This is why a complete sample test is more useful than judging one component by its marketing description.
For a broader customer-focused introduction, see our main DTF transfer guide.
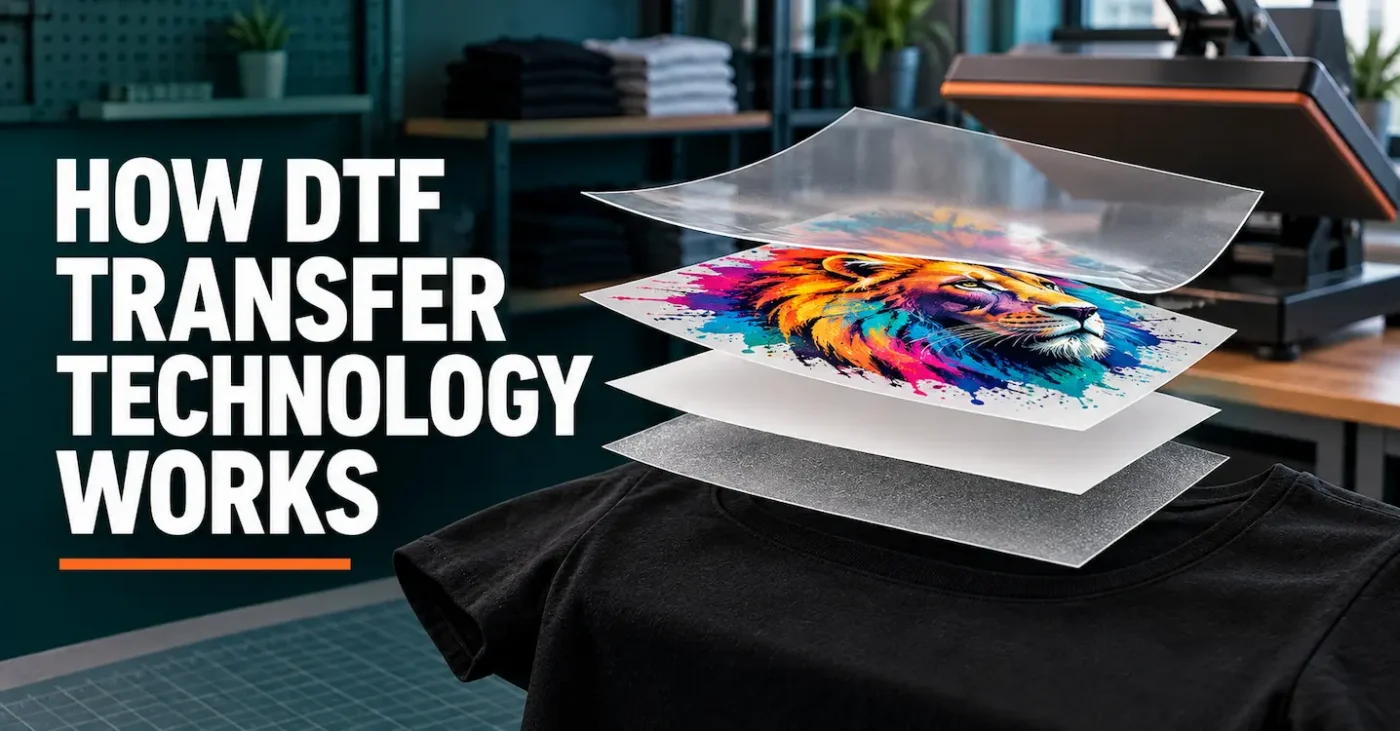
The layers in an apparel DTF transfer
A transfer looks simple when it arrives, but several layers are working together. While it is still on the carrier, the design is normally built in the reverse order needed on the garment. After application and peeling, the coloured image is visible from the outside and the adhesive sits against the textile.
| Component | Purpose | What it can influence |
|---|---|---|
| Carrier film and release coating | Receives the printed image, carries it through production and releases it after pressing | Ink holdout, surface finish, peel timing and fine-detail release |
| CMYK colour layer | Reproduces the visible colours, gradients, photographs and detail | Colour gamut, smoothness, sharpness and tonal appearance |
| White ink backing | Provides opacity and supports colour on dark or coloured garments | Brightness, coverage, edge alignment and print feel |
| Adhesive layer | Bonds the printed layers to the garment under heat and pressure | Adhesion, flexibility, edge strength and compatibility with the fabric |
| Garment | Becomes the permanent substrate for the applied design | Heat tolerance, texture, stretch, dye migration and wash behaviour |
The carrier film is removed after fitting and is not meant to remain on the shirt. The colour, white backing and adhesive become the finished print. Large solid artwork naturally covers more fabric and generally feels heavier than lettering, distressed artwork or a design with open areas.
The DTF production process step by step
- Artwork is prepared. The image is checked at its intended size and supplied with the required transparent background.
- The RIP processes the file. It mirrors the artwork for transfer, converts colour for the printer and generates the white backing channel.
- CMYK is printed onto the film. This becomes the visible face of the design after transfer.
- White ink is printed behind the colour. It creates opacity and gives the adhesive layer a consistent printed foundation.
- Adhesive is applied. The method depends on the production system, but the adhesive must cover the intended printed area without contaminating the surrounding film.
- The transfer is cured. Controlled heat prepares the ink-and-adhesive structure for storage and later application.
- The finished transfer is checked. Production checks may include nozzle quality, white coverage, visible contamination, curing and film behaviour.
- The customer applies the transfer. Heat and pressure activate the adhesive and bond the design to a compatible garment.
- The film is peeled. Peel timing depends on the transfer film and product instructions.
- A finishing press is completed. A suitable cover sheet protects the design while the final press completes the application and surface finish.
This article gives the technical overview. Our separate guide explains how to choose and use the right DTF transfer product.
What the RIP software controls
RIP stands for raster image processor. In a DTF workflow, RIP software translates the supplied artwork into instructions the printer can use. It is responsible for much more than pressing “print”.
Depending on the equipment and print mode, the RIP may control:
- mirroring and image orientation;
- resolution and print-pass settings;
- colour conversion and ink limits;
- the shape, density and choke of the white backing;
- nesting or layout across the film width; and
- production information used to repeat a job.
The white backing is not simply an uncontrolled block behind every pixel. It needs to support the design without protruding around the coloured edge. A small inward adjustment—often called a choke—can help prevent a visible white outline, but too much can leave coloured edges without enough support. The correct balance depends on the printer, resolution and artwork.
Colour profiles are also system-specific. An ink, film or print-mode change can alter how colour should be converted. This is why two printers receiving the same RGB values may not produce identical garments.
CMYK ink and the white backing
CMYK ink builds the colour image. White ink creates the opaque backing that allows the same transfer concept to work on black, navy, red and other coloured garments. Without adequate white support, the garment colour can visually dull or alter the artwork.
White ink is technically demanding because it contains a substantial pigment load. Modern purpose-built systems often include circulation, agitation, automated cleaning or nozzle-monitoring features to help manage it. These controls support consistency, but they do not eliminate routine maintenance or quality checks.
More ink is not automatically better. Excessive laydown can make curing harder to control and may add unnecessary weight. Insufficient laydown can reduce opacity. The goal is a controlled colour-and-white combination suited to the artwork and production system.
Our detailed article on DTF ink quality explains this interaction and lists the inks currently used across our product lines.
Film coating and release behaviour
DTF film is not ordinary clear plastic. Its receiving surface must hold the printed image during production, tolerate adhesive application and curing, remain stable during handling, and then release the design under the intended pressing and peeling conditions.
Film choice affects:
- how cleanly ink sits on the surface;
- whether fine details remain stable;
- the finish left on the design;
- how quickly the carrier can be peeled; and
- how forgiving the transfer is during application.
Peel terms describe application behaviour, not the quality of the artwork. A cold-peel transfer must cool before the carrier is removed. A hot-peel or Insta-Peel product is designed for removal sooner or immediately under its specified conditions. Peeling at the wrong stage can cause lifting even when the transfer itself was manufactured correctly.
DTF Transfers Australia’s standard Insta-Peel transfers are designed to peel immediately while hot. Specialty finishes—including Gold Foil, Silver Foil, Glitter, Glow in the Dark, Neon, Pearl and Reflective—are cold peel and supplied as individual sheets rather than gang sheets.
Adhesive and curing
The adhesive creates the bond between the printed layers and the textile. Its chemistry and application must suit the ink system, curing process, film and intended garment. Adhesive cannot be evaluated only by whether a transfer sticks during the first press; flexibility, edge strength, wash behaviour and garment compatibility also matter.
DTF Transfers Australia currently uses White Fine and Black Fine adhesive options in apparel-transfer production. Low Temperature adhesive is no longer used because the current fine adhesives have bridged the previous performance gap. Black Fine may help on selected dark or dye-prone garments, but it is not universally better and is not a guaranteed dye blocker.
Curing prepares the manufactured transfer before the customer receives it. Too little or too much heat can affect storage, application, feel and adhesion. Because curing requirements belong to the production system, customers ordering ready-to-press transfers do not need to cure them again before fitting.
Read our guides to DTF transfer curing and White Fine and Black Fine DTF adhesive for more detail.
Heat, pressure and peeling complete the system
The heat press is not an optional finishing accessory. It supplies the controlled heat and even pressure needed to activate the adhesive and bond the transfer to the garment. A temperature display alone does not prove that the entire platen is accurate, and pressure descriptions vary between machines.
For standard DTF Transfers Australia Insta-Peel transfers, use these as starting settings:
| Garment | Temperature | Time | Pressure | Peel | Final press |
|---|---|---|---|---|---|
| Cotton and suitable standard fabrics | 160°C | 8 seconds | Firm | Immediately while hot | 10 seconds |
| Polyester | 120°C | 30 seconds | Firm | Cold peel only — cool completely before peeling | 10 seconds at 120°C |
Pre-press until no steam remains. Test the exact transfer, garment and heat press before a production run, and follow the instructions supplied with the product. Raised seams, pockets and zips can prevent even contact. See the current DTF transfer fitting instructions before application.
Garment compatibility is part of the technology
DTF can work on many cotton, polyester and blended garments, but “many” should not be turned into “every material”. Fabric composition, dyes, coatings, texture, stretch and heat sensitivity all influence the result.
Polyester deserves particular attention. Some dyes can migrate into pale areas of the transfer when heated, while some fabrics show gloss or platen marks. Lower-temperature application can reduce risk, but no adhesive or setting can guarantee success on every dyed polyester garment.
Other difficult items may have water-repellent coatings, uneven surfaces, heavy seams or materials that distort under pressure. Always identify the fabric and carry out an application and wash test before committing to a full order.
Our guides to different T-shirt fabrics and DTF printing on polyester explain these risks in more detail.
Our current production systems
Different products can require different equipment and ink workflows. As at September 2026, DTF Transfers Australia uses:
- Coltex inks for apparel DTF gang sheets;
- the newly updated generation of Brother Innobella inks for cut-sheet DTF transfers;
- the newly updated generation of Brother Innobella inks for iron-on DTF transfers; and
- genuine Morpho inks for UV DTF stickers.
UV DTF is a separate process for suitable hard surfaces. It uses different inks, films and application behaviour from the apparel DTF system described in this article. A UV DTF sticker should not be heat pressed onto a T-shirt, and an apparel DTF transfer is not a replacement for a UV sticker.
The production system behind a gang sheet may therefore differ from the system behind a cut sheet or UV DTF product. Customers should order the product made for the intended surface and follow that product’s artwork and application instructions.
How to assess DTF technology claims
DTF marketing frequently uses words such as “revolutionary”, “premium”, “eco-friendly”, “instant”, “soft” and “universal”. These descriptions need context.
| Claim | Useful follow-up question |
|---|---|
| Works on any fabric | Has the exact garment, colour, coating and heat tolerance been tested? |
| Instant peel | At what tested temperature, time and pressure, and does this apply to every finish? |
| Ultra-soft | What artwork coverage, ink laydown, adhesive and finishing press were used? |
| No cracking or fading | What application, wash and wear conditions support the statement? |
| Eco-friendly | Which part of the product or process is being measured, and is supporting evidence available? |
| Perfect colour | Which printer profile, ink, film, garment and viewing conditions were used? |
A controlled sample is usually more valuable than an adjective. Test the finished transfer on the actual garment, document the pressing conditions, inspect colour and fine detail, and wash it according to the intended care process.
Frequently asked questions about DTF transfer technology
What does DTF stand for?
DTF stands for Direct to Film. The artwork is digitally printed onto a coated carrier film, given a white backing and adhesive layer, cured, and later transferred to a compatible garment with heat and pressure.
Why does a DTF transfer need white ink?
White ink creates an opaque backing beneath the coloured artwork. It helps the design remain bright and visible on black, navy, red and other coloured garments.
Which parts remain on the shirt?
The coloured print, white backing and adhesive remain as the applied design. The clear carrier film is peeled away according to the transfer’s hot-, warm- or cold-peel instructions.
Does the customer need to add or cure adhesive?
No. DTF Transfers Australia supplies finished, cured transfers ready for application. The customer positions the transfer, heat presses it, peels the carrier correctly and completes the finishing press.
Is apparel DTF the same as UV DTF?
No. Apparel DTF is heat applied to suitable textiles. UV DTF creates adhesive graphics for suitable hard surfaces and uses a separate ink and film system. The products are not interchangeable.
Can DTF transfers be applied to every fabric?
No universal transfer works on every textile, coating or construction. Cotton, polyester and many blends can work well, but the exact garment must tolerate the application conditions and should be tested before production.
Why do some DTF transfers peel hot while others must cool?
The carrier film and release coating are engineered for particular peel behaviour. Removing film outside its intended temperature range can cause fine details or edges to lift. Follow the instructions for the exact transfer.
Does newer technology automatically produce a better transfer?
No. New printers, inks and films can improve particular parts of production, but artwork, profiling, maintenance, curing, application and garment choice still affect the finished result. Test evidence matters more than the age of the equipment.
The result is only as strong as the complete workflow
DTF transfer technology works because software, ink, white backing, film, adhesive, curing and heat pressing perform different jobs in sequence. No single layer can guarantee colour, softness, durability or compatibility on its own.
For customers, the practical advantage is that the difficult manufacturing stages are already completed. Supply clean, print-ready artwork, order the appropriate transfer, test it on the intended garment and follow the fitting instructions. When you are ready, you can build a custom DTF gang sheet or browse the DTF Transfers Australia shop.
