
Running a Print Business
How to Start a Custom Cap Business with DTF Transfers
Apr
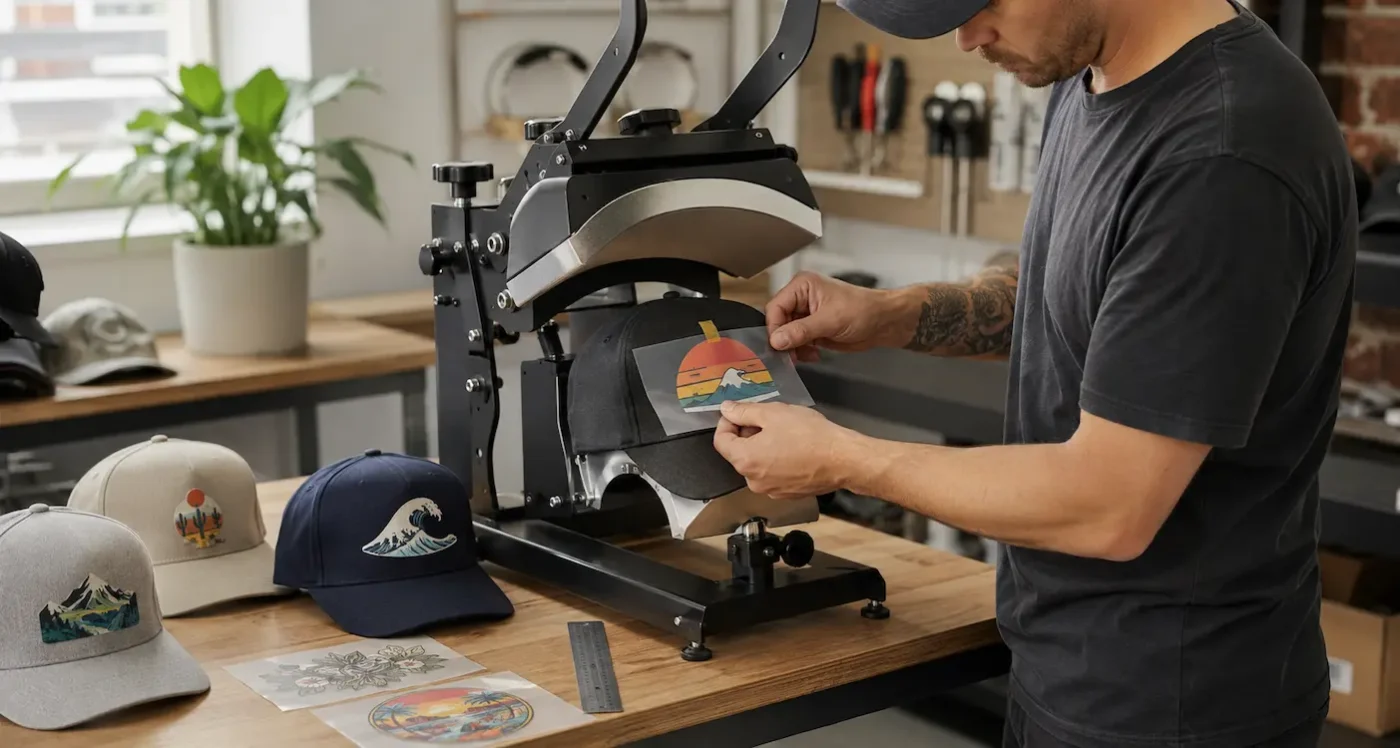
To start a custom cap business with DTF transfers, begin with a suitable five-panel cap, a cap heat press and a small range of tested designs. Buying ready-to-press transfers lets you offer full-colour decoration without operating a DTF printer.
The cap itself matters as much as the artwork. A curved crown, centre seam, sweatband or brim can prevent even contact during pressing. Choosing a cap that fits your equipment makes it easier to produce a consistent result.
This guide covers the practical steps: choosing customers and caps, preparing artwork, testing the print, pricing your work and managing the first orders.
TL;DR
- Start with a five-panel cap that has an uninterrupted front panel. Avoiding a centre seam makes application more straightforward.
- Match the cap to the press. The crown needs secure, even support across the whole design.
- Size artwork for the supported area. The visible front panel may be larger than the area you can press reliably.
- Test the exact product. Cap style, colour, fabric and construction can all change the result.
- Price the whole job. Include artwork handling, pressing, samples, mistakes, packaging and selling costs.
- Launch a focused range. Add styles and finishes after you have tested them and established demand.
Choose a customer and a manageable first range
Custom caps can complement T-shirts and other merchandise, or form a small product range of their own. The opportunity depends on who you serve and whether you can supply the result they expect at a workable price.
Start with a clear type of order
A local business ordering staff caps has different needs from an artist selling a limited collection. Choose one or two customer groups before buying stock.
| Customer | Likely priorities | Useful first offer |
|---|---|---|
| Local businesses | Readable branding, consistent colours and easy reordering | A tested cap with a standard front logo position |
| Clubs and events | Approved artwork, quantities and a firm deadline | A small range of colours with one agreed design |
| Artists and clothing labels | Print detail, cap shape and presentation | A sample-led release using original artwork |
| Personalised gift buyers | Correct spelling, clear previews and delivery information | A controlled choice of names, lettering styles and colours |
Speak to potential buyers about fit, colour, quantity and preferred decoration. Find out whether they want a printed finish, embroidery or a patch before developing the offer.
Keep the first range focused
Begin with one or two proven cap styles and a small colour selection. This makes stock, photographs, templates and application records easier to manage.
“Trucker”, “snapback” and “five-panel” describe different features. A closure or mesh back does not tell you whether the front panel is suitable for your print. Inspect each actual style before adding it to the range.
Choose a cap that is suitable for pressing
The cap needs to sit securely on the press with even support beneath the intended print. Check crown height and curve, internal structure, fabric and the distance from the brim.
Seams, cords, eyelets and folded material can interrupt contact. Water-resistant coatings and heat-sensitive components can also make a cap unsuitable for the intended process.
Why we recommend five-panel caps
We recommend starting with a five-panel cap that has a single, uninterrupted front panel. A typical six-panel cap has a seam down the centre of the front, which can create uneven pressure or a visible ridge through the artwork.
Removing that centre-seam complication gives you a simpler starting point. It does not make every five-panel cap automatically suitable: the shape, fabric and internal construction still need testing on your press.
A six-panel cap may work with artwork positioned away from the seam or with a tested specialist process. For your first range, an uninterrupted front panel is usually easier to manage.
Decide whether DTF suits the job
DTF stands for direct to film. The design is printed onto carrier film and prepared with adhesive, ready to be heat applied to a compatible cap. DTF Transfers Australia supplies the transfers; you source the caps and apply the decoration.
Where DTF helps
DTF can suit detailed colour logos, illustrations, short runs and changing names or designs. The complete colour image is supplied on one carrier, without the internal weeding required by cut vinyl.
Standard cap designs can share a DTF gang sheet, including different logos or print sizes. Leave room to separate the transfers and check every design at its final dimensions.
Other methods have their place. Embroidery gives a stitched, dimensional finish; cut heat transfer vinyl can be practical for simple lettering; patches offer their own textures and attachment options. Compare the result the customer wants as well as the production cost.
Our DTF and cut HTV comparison explains when each transfer method may suit.
Recognise when to change the cap or method
A transfer that extends beyond the supported press area may not bond evenly. Large solid designs can also crease around a curve or feel more substantial than a small logo.
If the cap cannot tolerate the required heat or sit securely on the platen, use another blank or decoration method. Increasing the temperature is not a reliable fix for poor contact.
Set up your cap press and workspace
For repeat production, use a suitable cap heat press with a curved platen and a secure hold-down. The platen must support the crown and the full design, with controllable temperature, time and pressure.
Allow for the specified cover sheet, heat-resistant tape, measuring tools, sample caps and a clean inspection and packing area. Follow the equipment manufacturer’s operating and workspace instructions.
A household iron or an ordinary flat press is not a direct substitute for the support provided by a cap press. Before buying equipment, confirm that it can handle your chosen cap shapes and decoration sizes.
Stahls’ cap press loading guide highlights the importance of clearing obstructions, positioning the sweatband and keeping the cap secure on a suitable platen. These loading principles help explain why the cap and press need to work together.
Prepare artwork at the right size
Measure the usable area with the blank loaded on your actual press. Do not use the entire visible front panel as the print area, and do not assume a size that worked on another cap will fit.
Make a paper template at the proposed dimensions. Check its position relative to the brim and seams, then view the cap as someone would wear it. A wide design may look good on a flat mock-up but wrap too far around the crown.
Small logos benefit from clear shapes and readable lettering. Simplify secondary details rather than shrinking an intricate design until the text and lines become too fine.
For our transfers, prepare a transparent PNG at 300 DPI at the intended print size and review the current artwork requirements. Files are printed as supplied. Check spelling, size and transparency before uploading; artwork correction and customer proofs should not be assumed to be included.
Apply and test your first samples
Use the instructions for the specific transfer and your cap press, then validate the combination on a spare cap. T-shirt settings should not be treated as proof that a curved cap application will work.
- Inspect and load the cap. Remove packaging inserts and arrange movable components so the print area is supported without ridges.
- Check contact before applying. Confirm that the whole design sits inside the area the platen can press evenly.
- Prepare the fabric as instructed. Check its response to any required pre-press and stop if it marks or distorts.
- Position and secure the transfer. Use the approved template and suitable heat-resistant tape where needed.
- Press with the specified protection and settings. Keep a record of the press, platen and application conditions.
- Peel and finish as directed. Follow the product’s peel method and any required finishing press.
- Inspect the finished cap. Check the print edges, surface, colour and crown shape before packing.
Keep the current DTF fitting instructions available at the press. Standard Insta-Peel and speciality cold-peel transfers have different application sequences.
Check more than the first appearance
Test each new cap style and colour with the intended transfer. Look for incomplete adhesion, lifting, shine, scorching and distortion. Polyester may also develop dye migration, where colour from the cap discolours the print.
Recheck after the sample has cooled and rested, then assess performance under care conditions suitable for both the cap and the decoration. A cap that looks acceptable immediately after pressing has not yet demonstrated how it will hold up in use.
If one side or edge performs differently, investigate loading, platen fit and pressure before changing heat settings. Keep an approved sample and test more than one cap before accepting a substantial order.
Price custom caps properly
Start with the cost of delivering an acceptable finished cap. Include the blank, transfer, inbound freight, artwork handling, application labour, samples, spoilage, packaging, payment fees and an allocation for equipment and overheads.
Cap handling can take longer than the press timer suggests. Loading, positioning and inspecting each item are part of the job. Time a small test batch rather than estimating labour from the heat cycle alone.
For example, six minutes of work at an illustrative labour rate of $30 per hour adds $3 per cap before materials and other costs. Use your own measured time and business costs when setting prices.
A separate setup or artwork charge may make small orders viable. Quantity discounts should reflect real savings in preparation or purchasing. Personalised names may still require individual checking even on a larger order.
Keep tax treatment consistent in your costing and confirm what applies to your business. For the broader approach to garment pricing, see how to price custom printed apparel.
Manage stock, artwork and approvals
Record the cap brand, style, colour, quantity, artwork version, print size, placement and deadline for each order. For personalised items, keep an approved list of names and capitalisation.
If your cap business provides proofs, explain what the customer is approving and obtain that approval before you order the transfers. Your customer approval process is separate from our print-as-supplied transfer service.
Keep some spare tested blanks for samples, defects and production errors. Confirm availability before promising repeat orders, and avoid silently substituting a different cap construction.
Keep permissions and product information organised
Check the commercial-use permissions for customer logos, fonts and other supplied artwork, and retain the relevant records. Our guide to T-shirt artwork and copyright issues is a useful starting point for an apparel artwork review.
Before trading, check the registrations, insurance, tax arrangements and customer policies appropriate to your business. Describe the cap and decoration accurately, and do not add unverified protective or performance claims.
Present and sell the finished product
Use photographs of your tested sample, including front, side, back and worn views. Show a close-up of the decoration so customers can distinguish a printed finish from embroidery or a patch.
State the cap’s fabric, construction, adjustment, colours and available decoration positions. Explain what the price includes, how artwork is supplied, whether you provide proofs and when production begins.
Separate production time from delivery estimates. Include care information suited to the cap and print, along with accessible contact and returns information. Our guide to writing useful apparel website content covers these buying questions.
Choose a sales channel that reaches your customer
For local business caps, a physical sample and clear quote may be more useful than a large online catalogue. For artist merchandise, strong product photographs and an existing audience may be the better starting point.
Markets let buyers assess fit and finish in person. An online store can support repeat purchases, while approved club or event orders can provide a defined first batch. Track which orders cover their costs and lead to repeat work, rather than judging a channel only by enquiries or social-media likes.
A practical launch plan
Choose one customer group, source a few cap samples and test them on your press. Build your artwork templates around the successful combination, then produce photographs and calculate the full cost.
Launch with a manageable order quantity and a realistic deadline. Record questions and production problems, improve the process and expand the range only when those results support it.
Before accepting the first order
- The exact cap style and colour have passed application testing.
- The design fits inside the supported press area.
- Artwork, spelling, size and placement are confirmed.
- The price covers handling, testing, mistakes and selling costs.
- Stock and production capacity support the promised deadline.
- Inspection, care information and packing are planned.
Frequently asked questions
What is the best cap style to start with?
We recommend a five-panel cap with an uninterrupted front panel. Avoiding a centre seam makes even contact easier to achieve, but the exact cap still needs testing for fabric response and platen fit.
Can I print over a six-panel cap’s centre seam?
Some specialist combinations can work, but the seam can affect pressure and remain visible through the design. For a first range, choose an uninterrupted panel or a tested position away from the seam.
Do I need a cap heat press?
For repeat production, a suitable cap press provides curved support and secure loading. An ordinary flat press or household iron does not provide the same setup.
What size should a cap transfer be?
Measure the area receiving even pressure on the actual cap and platen. Check a paper template before ordering. There is no universal size that suits every crown shape.
What temperature should I use?
Use the transfer and equipment instructions as your starting point, then test the exact cap. Fabric, construction, platen contact and press accuracy all affect the result.
Can DTF be applied to polyester caps?
Some polyester caps are suitable. Test the actual product for heat marks, distortion, adhesion and dye migration rather than relying on the fibre name alone.
Do I need to print my own transfers?
No. You can purchase ready-to-press DTF transfers and apply them yourself. That lets you develop the cap business without operating a DTF print and curing system.
Is DTF better than embroidery?
They offer different results. DTF can suit detailed colour and short runs, while embroidery provides a stitched finish. Choose around the cap, artwork, quantity and customer’s preference.
Build the business around a tested cap
A reliable first product makes pricing, photography and repeat orders easier. Start with a suitable five-panel cap, a well-matched press and artwork sized for the supported area, then build your range from successful samples.
When you are ready to test your designs, order a custom DTF gang sheet. For more on the transfer process, read our DTF transfer printing guide.
